The purpose of this project was to model a complex product and produce photorealistic renders.
The Magico Ultimate III speakers contain multiple interesting and challenging-to-model shapes, and are thus a perfect candidate for the project. A number of techniques were utilized to achieve the design.
The speakers were modeled in PTC Creo, while materials, shading, ligthing and rendering was done in Autodesk 3D Studio Max.
Smaller details, such as screws, cables and speaker terminals were not modeled, in order to limit the scope of the project somewhat.
.01
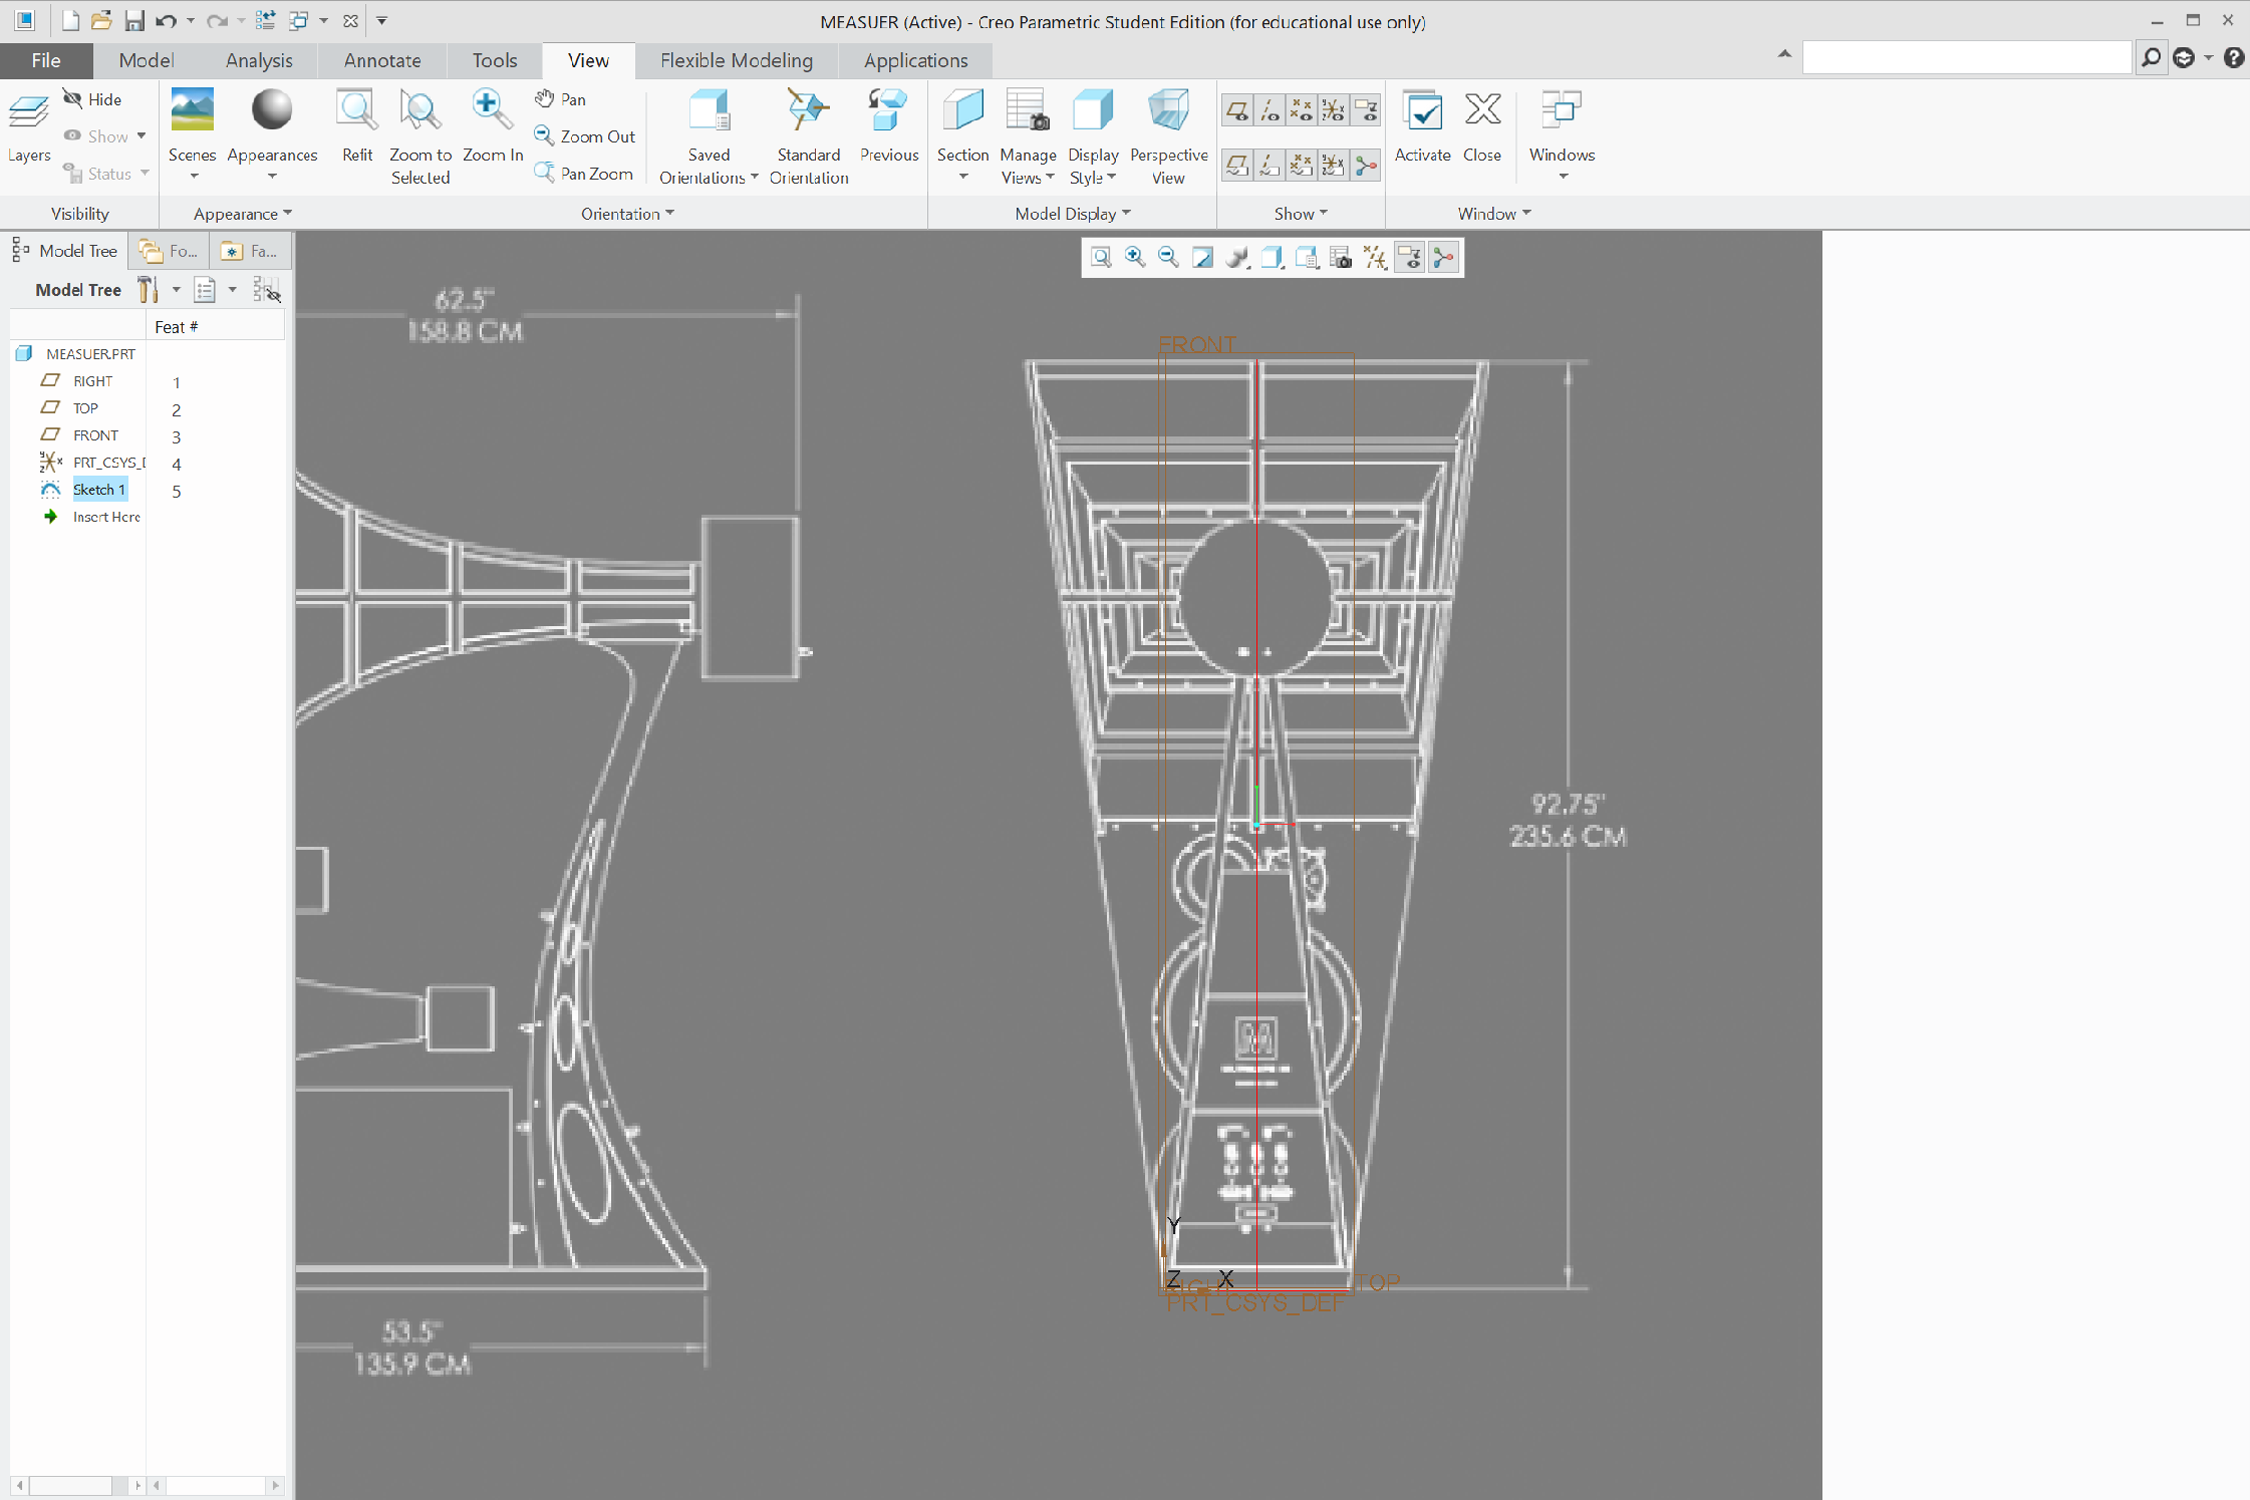
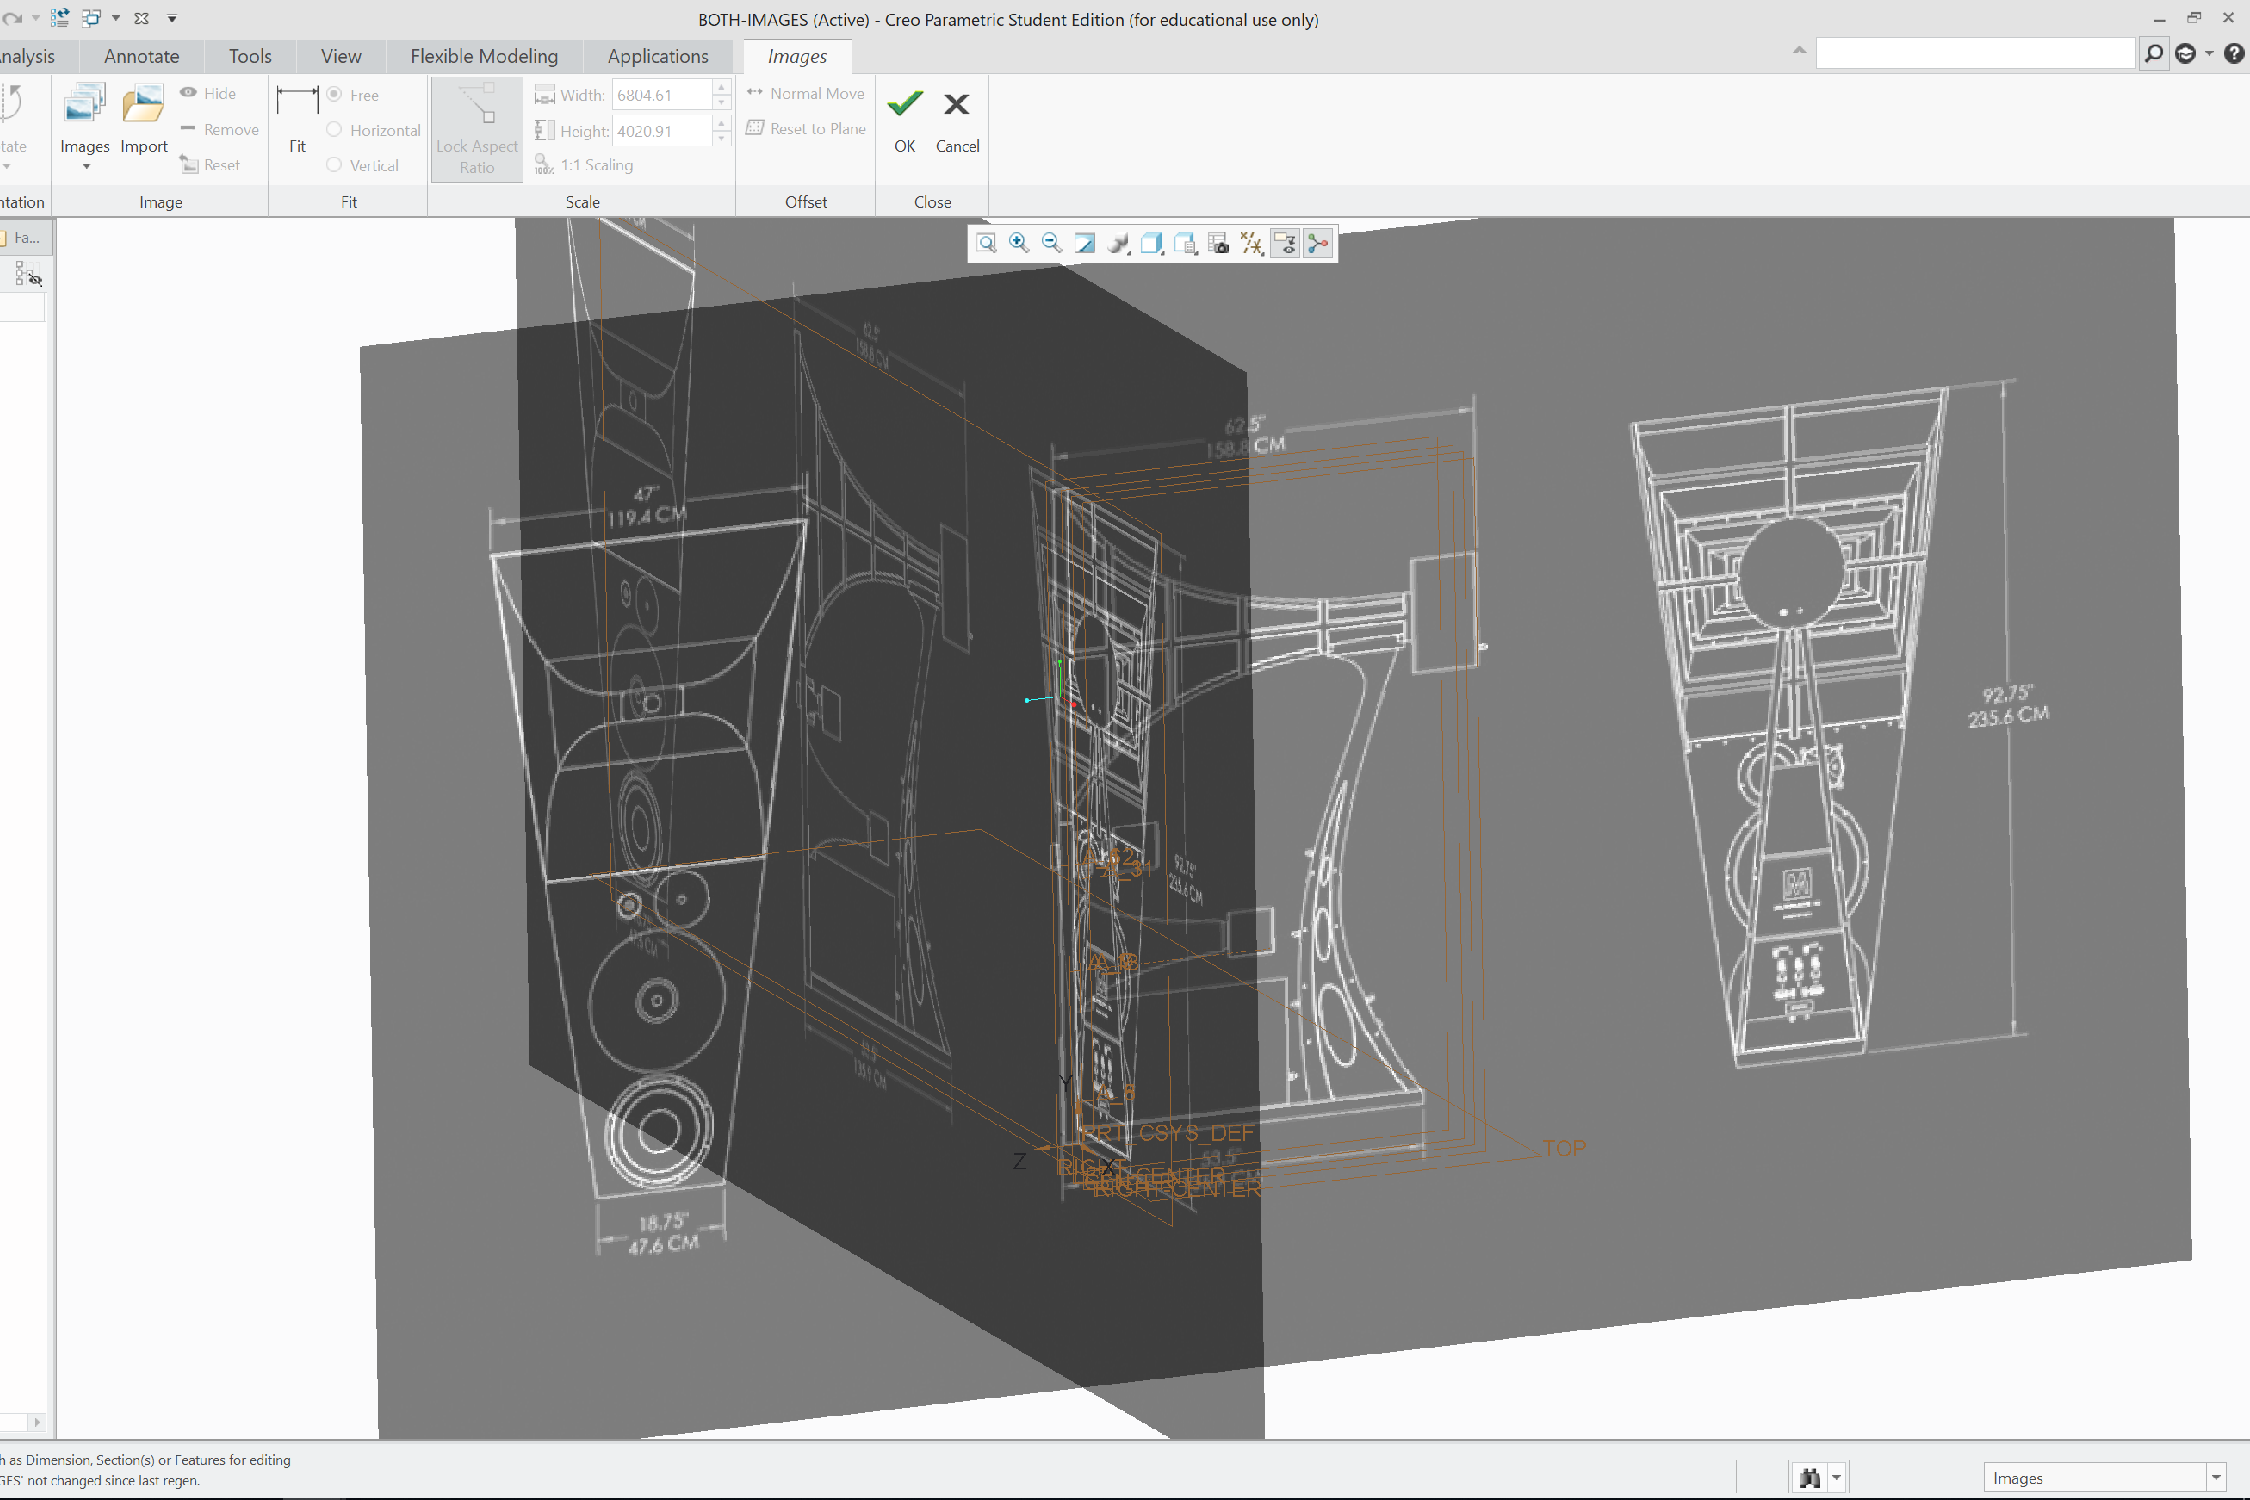
Measuring from sketch
Before beginning the modeling phase, a sketch available from Magico containing some measurements was imported and fitted on two datum planes.
Other measures were estimated by proportions.
02.
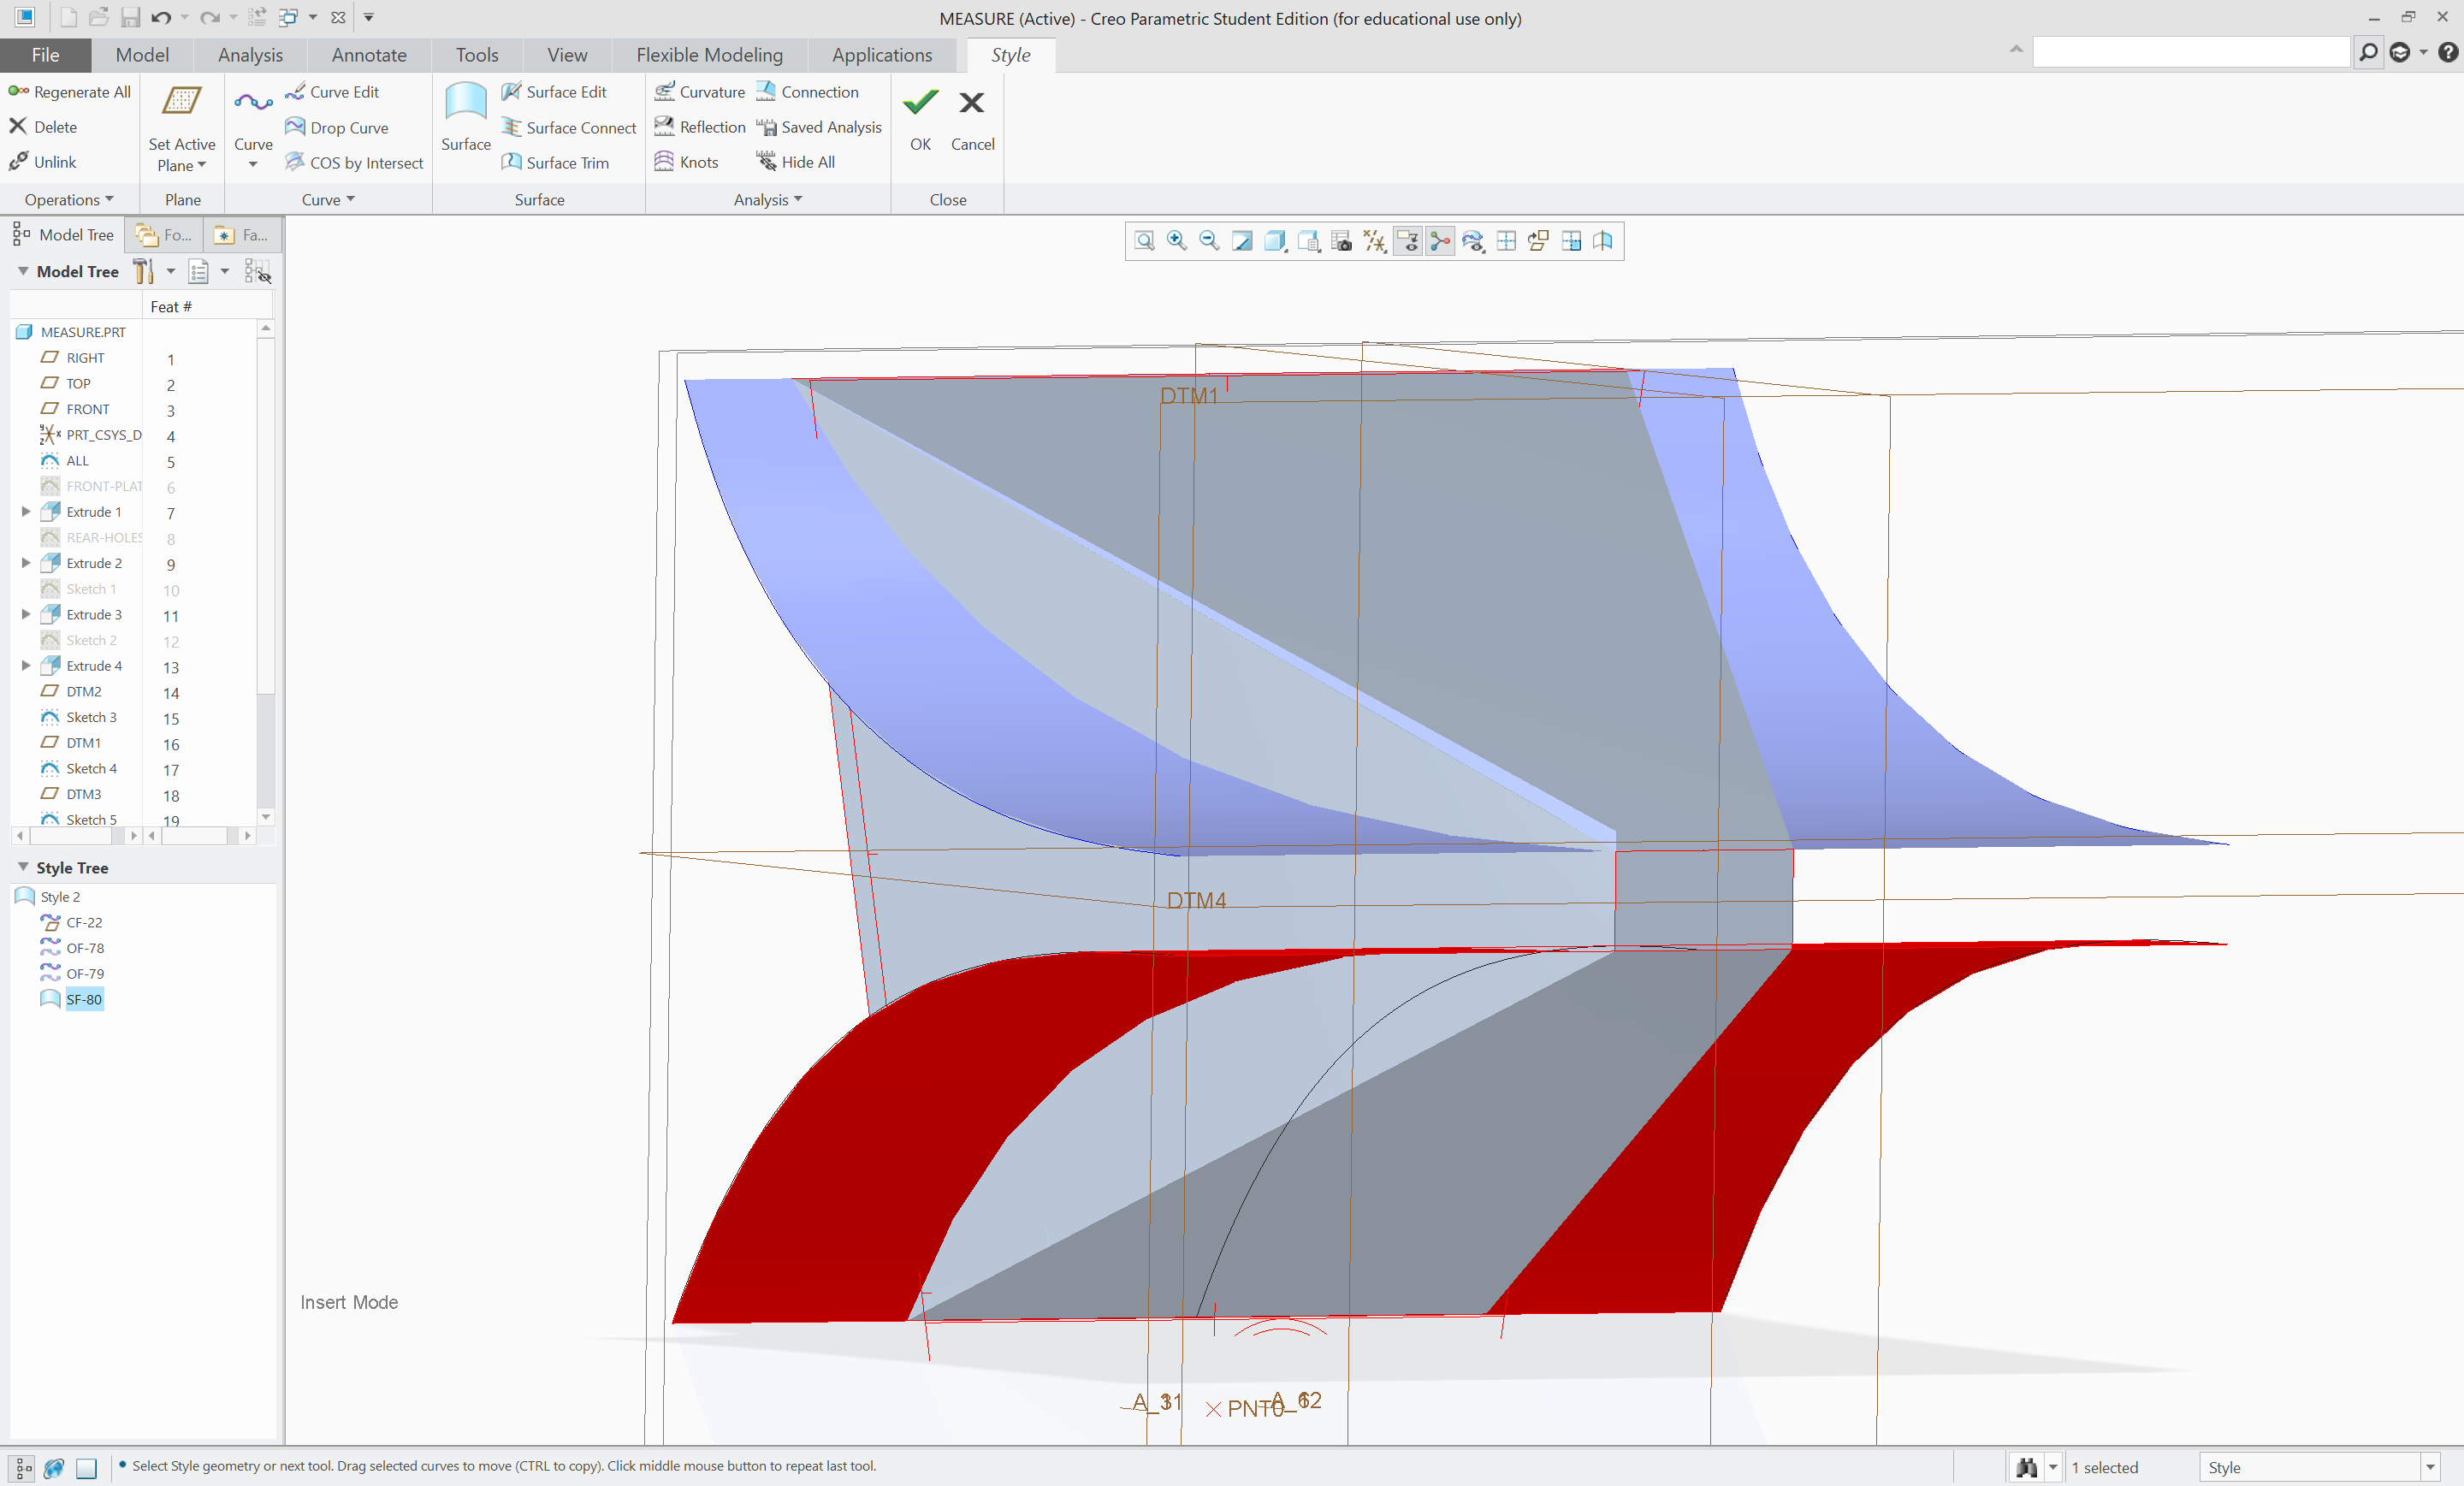
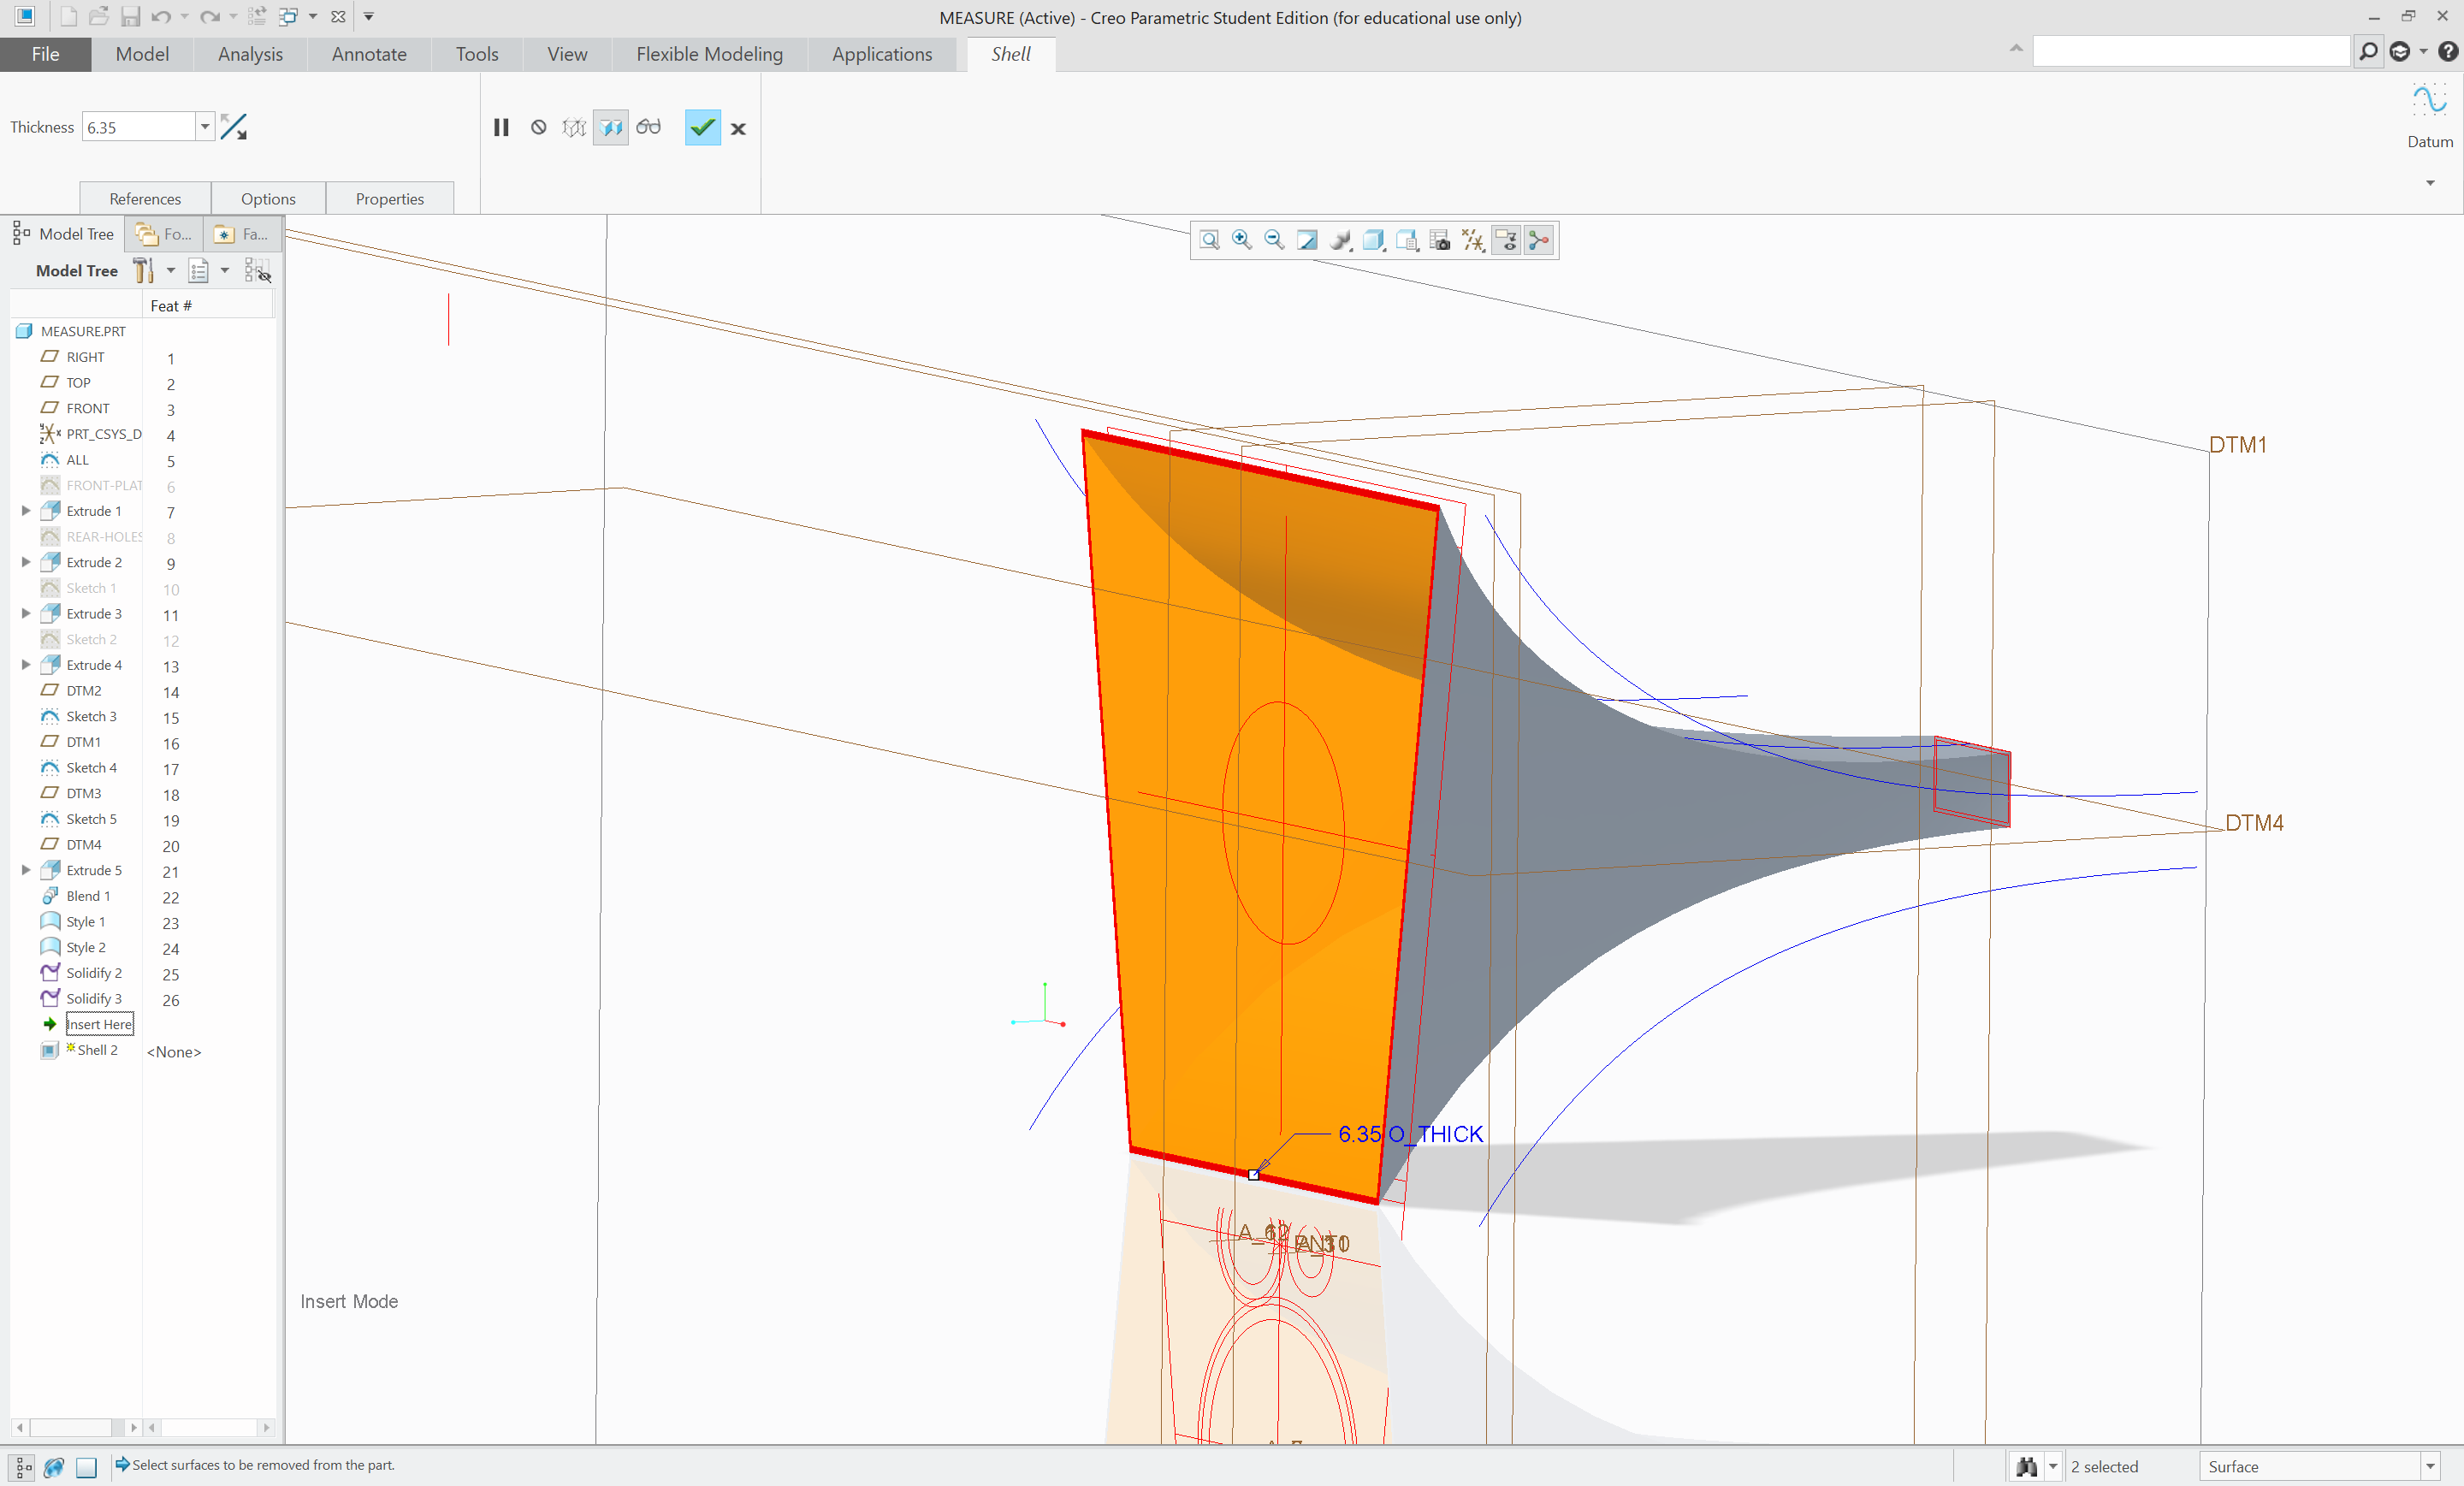
Modeling the large horn
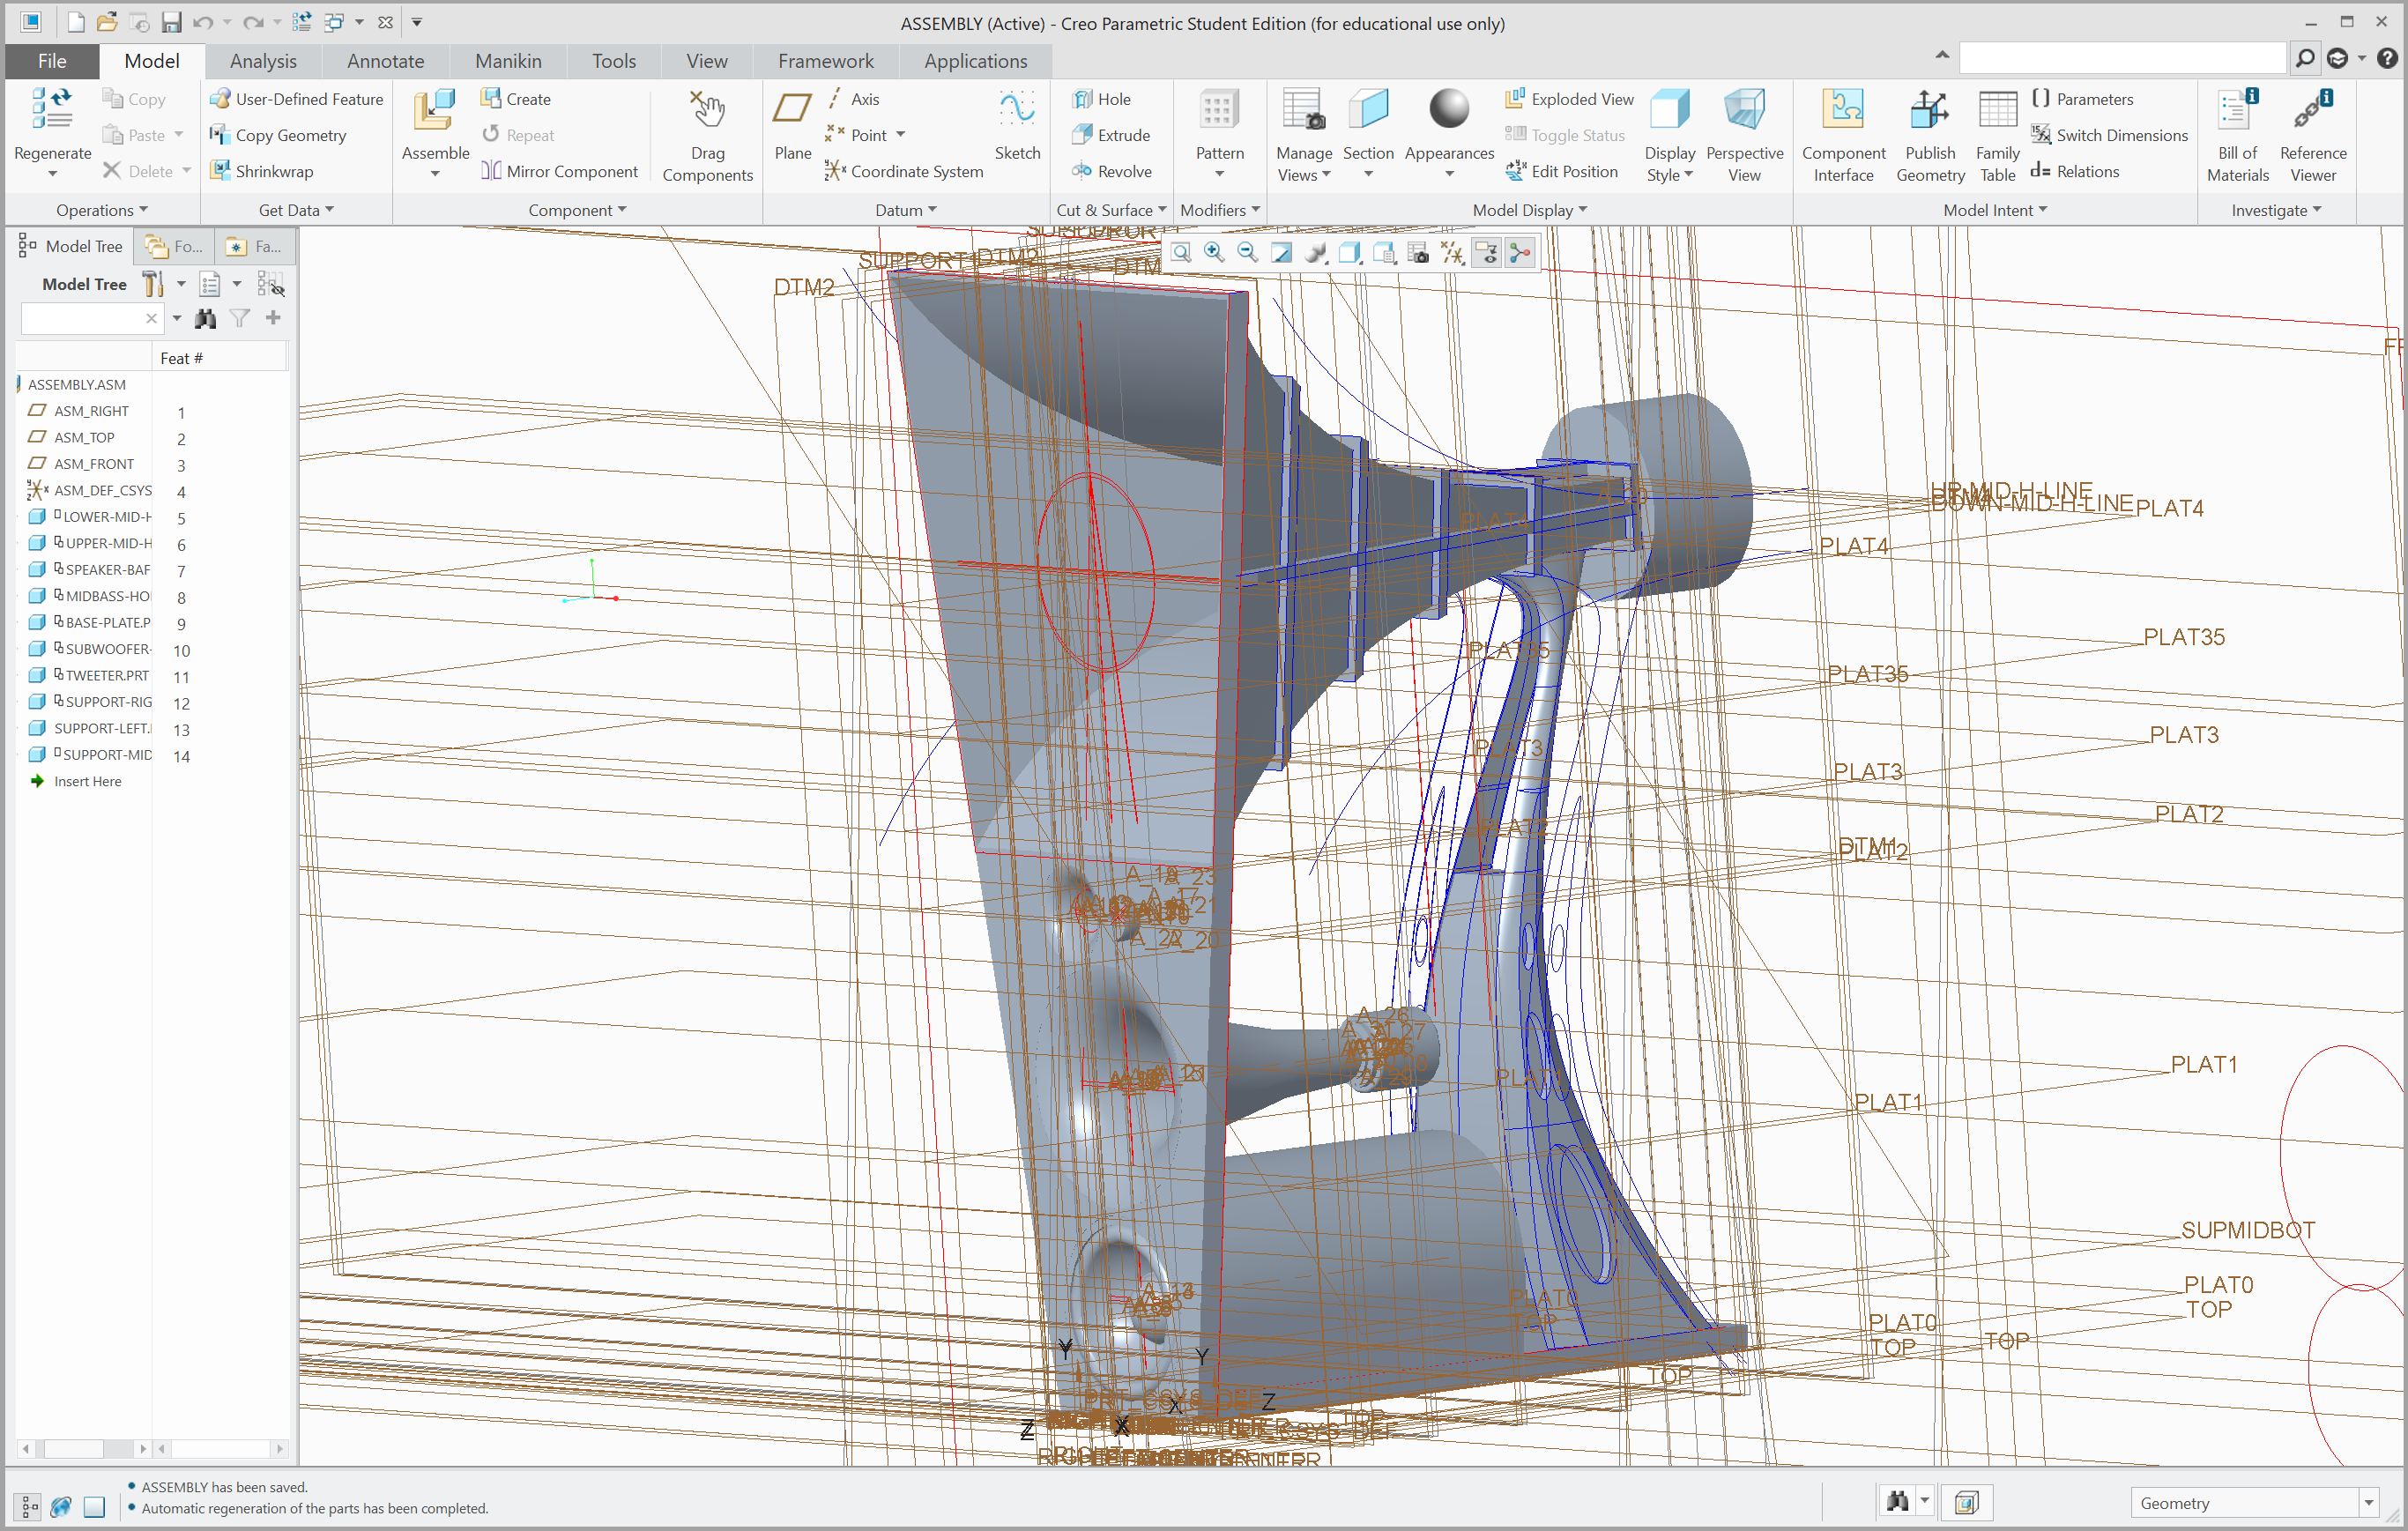
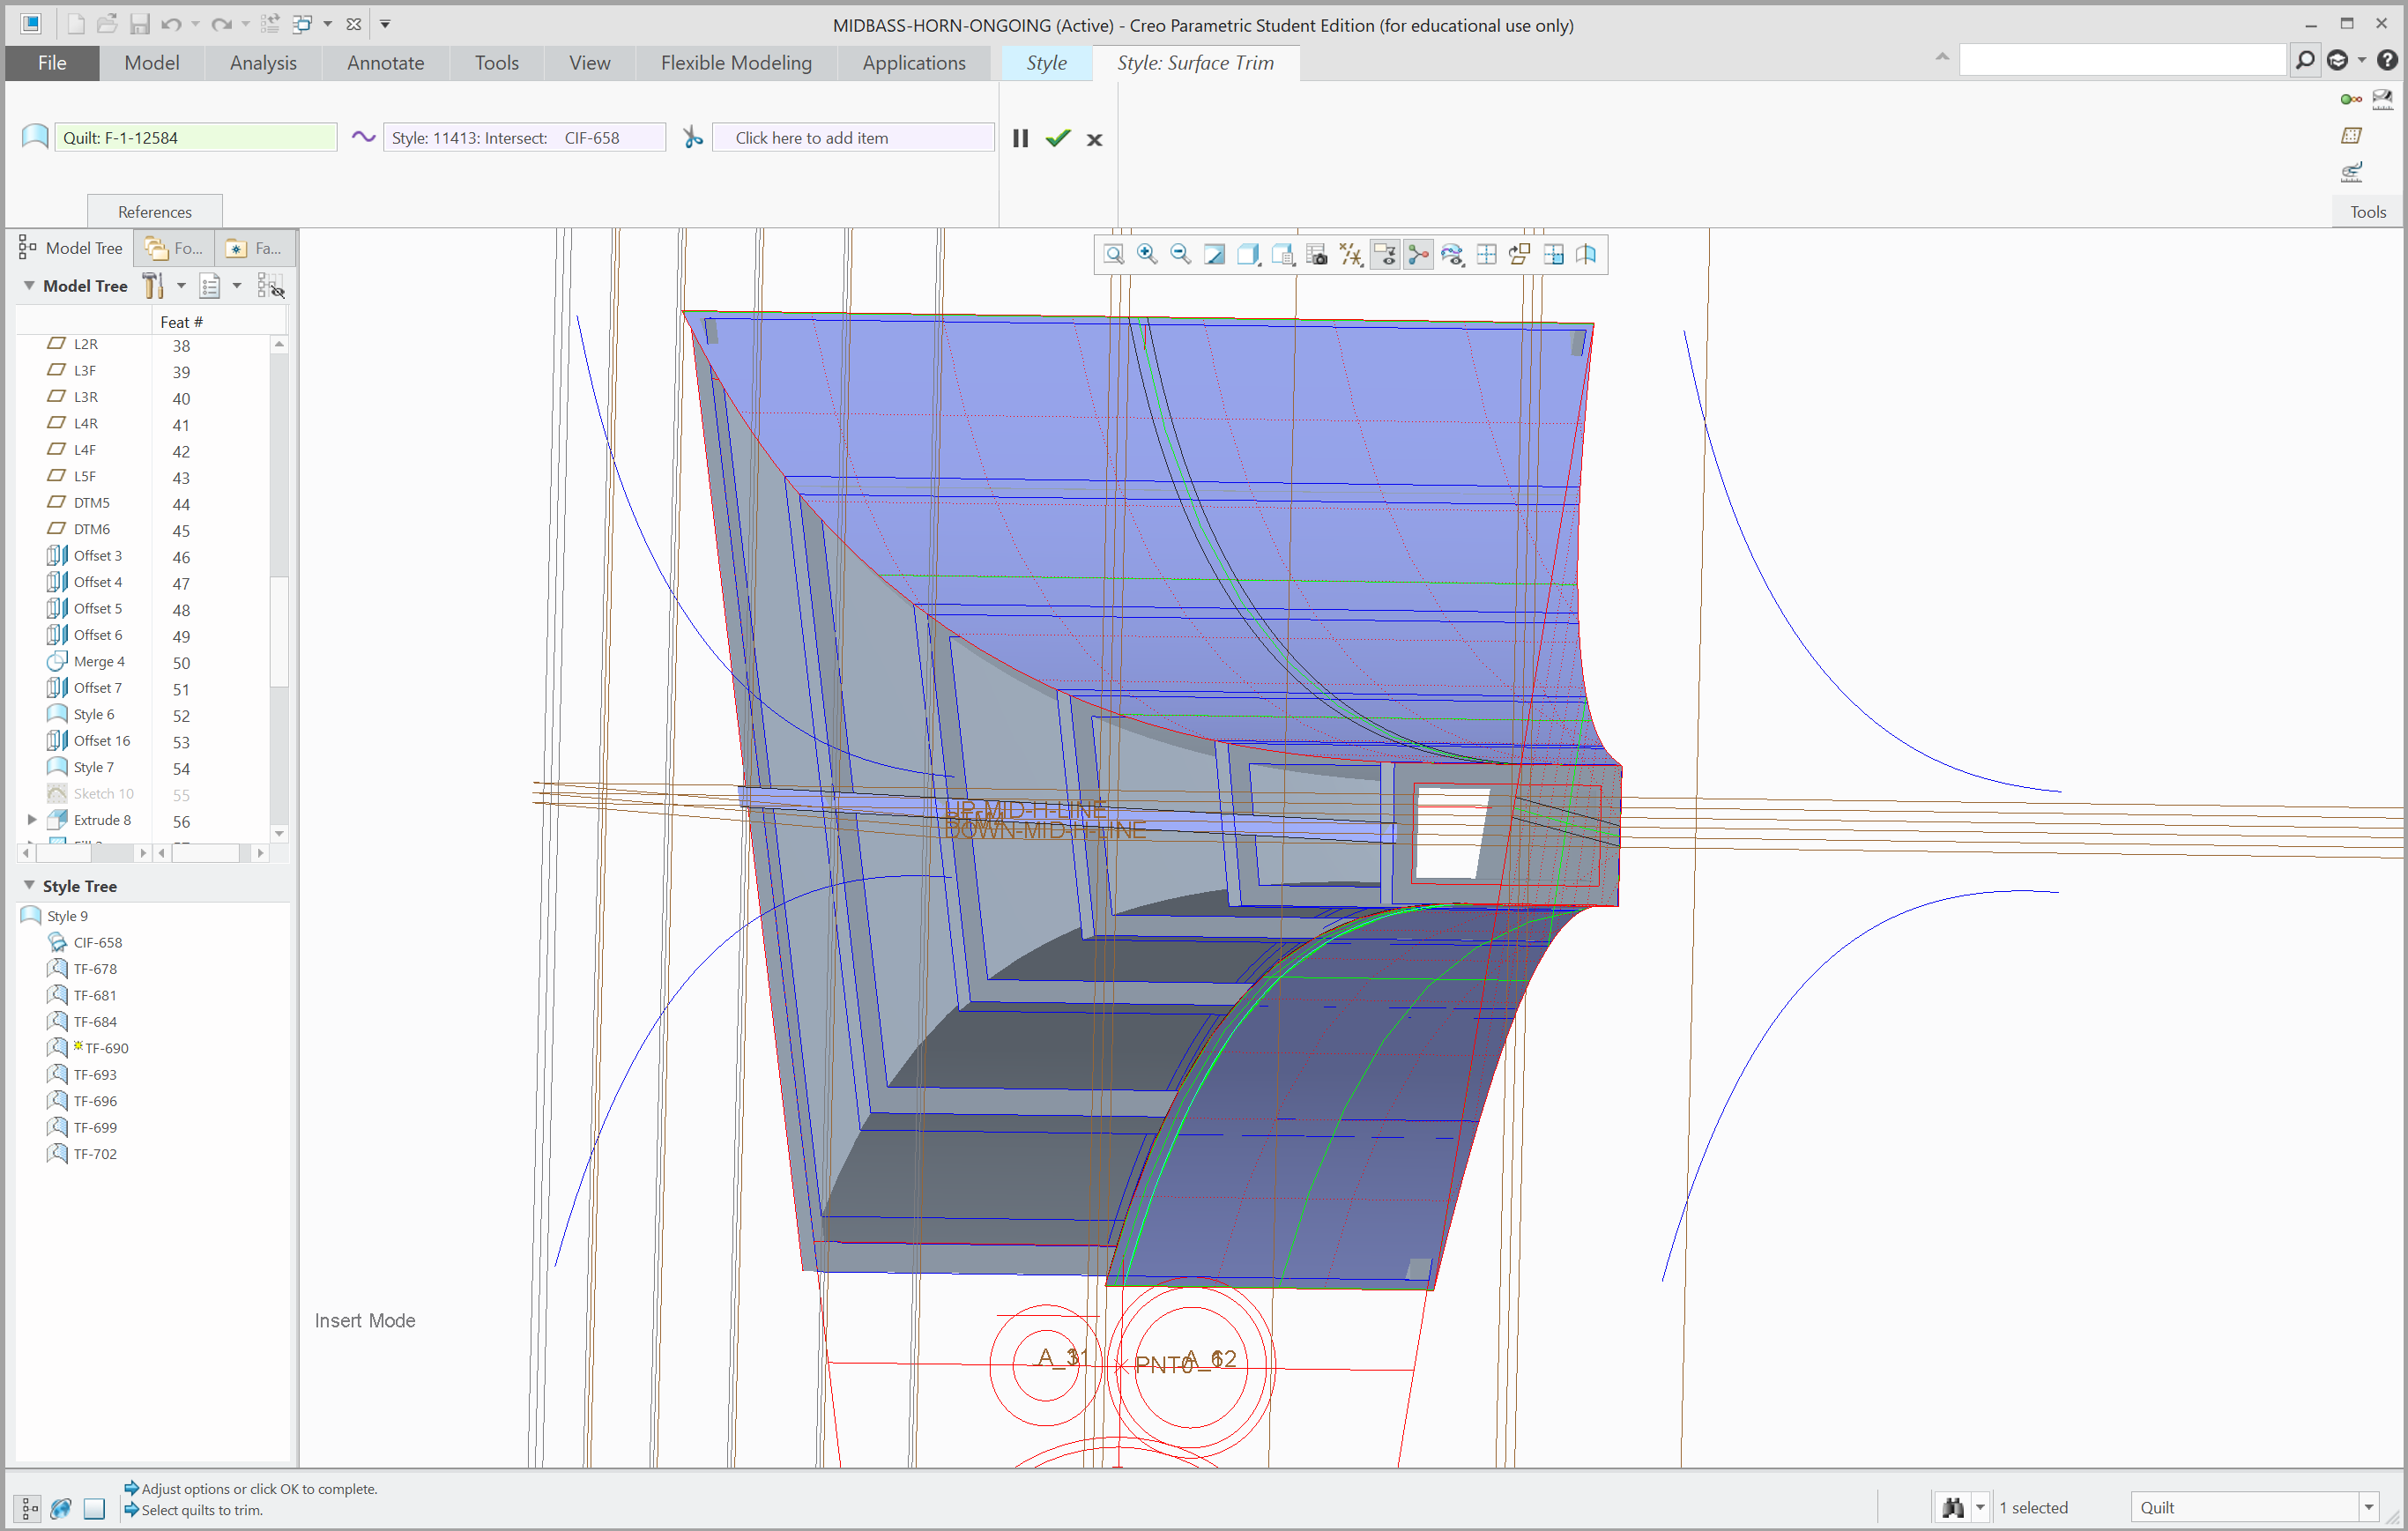
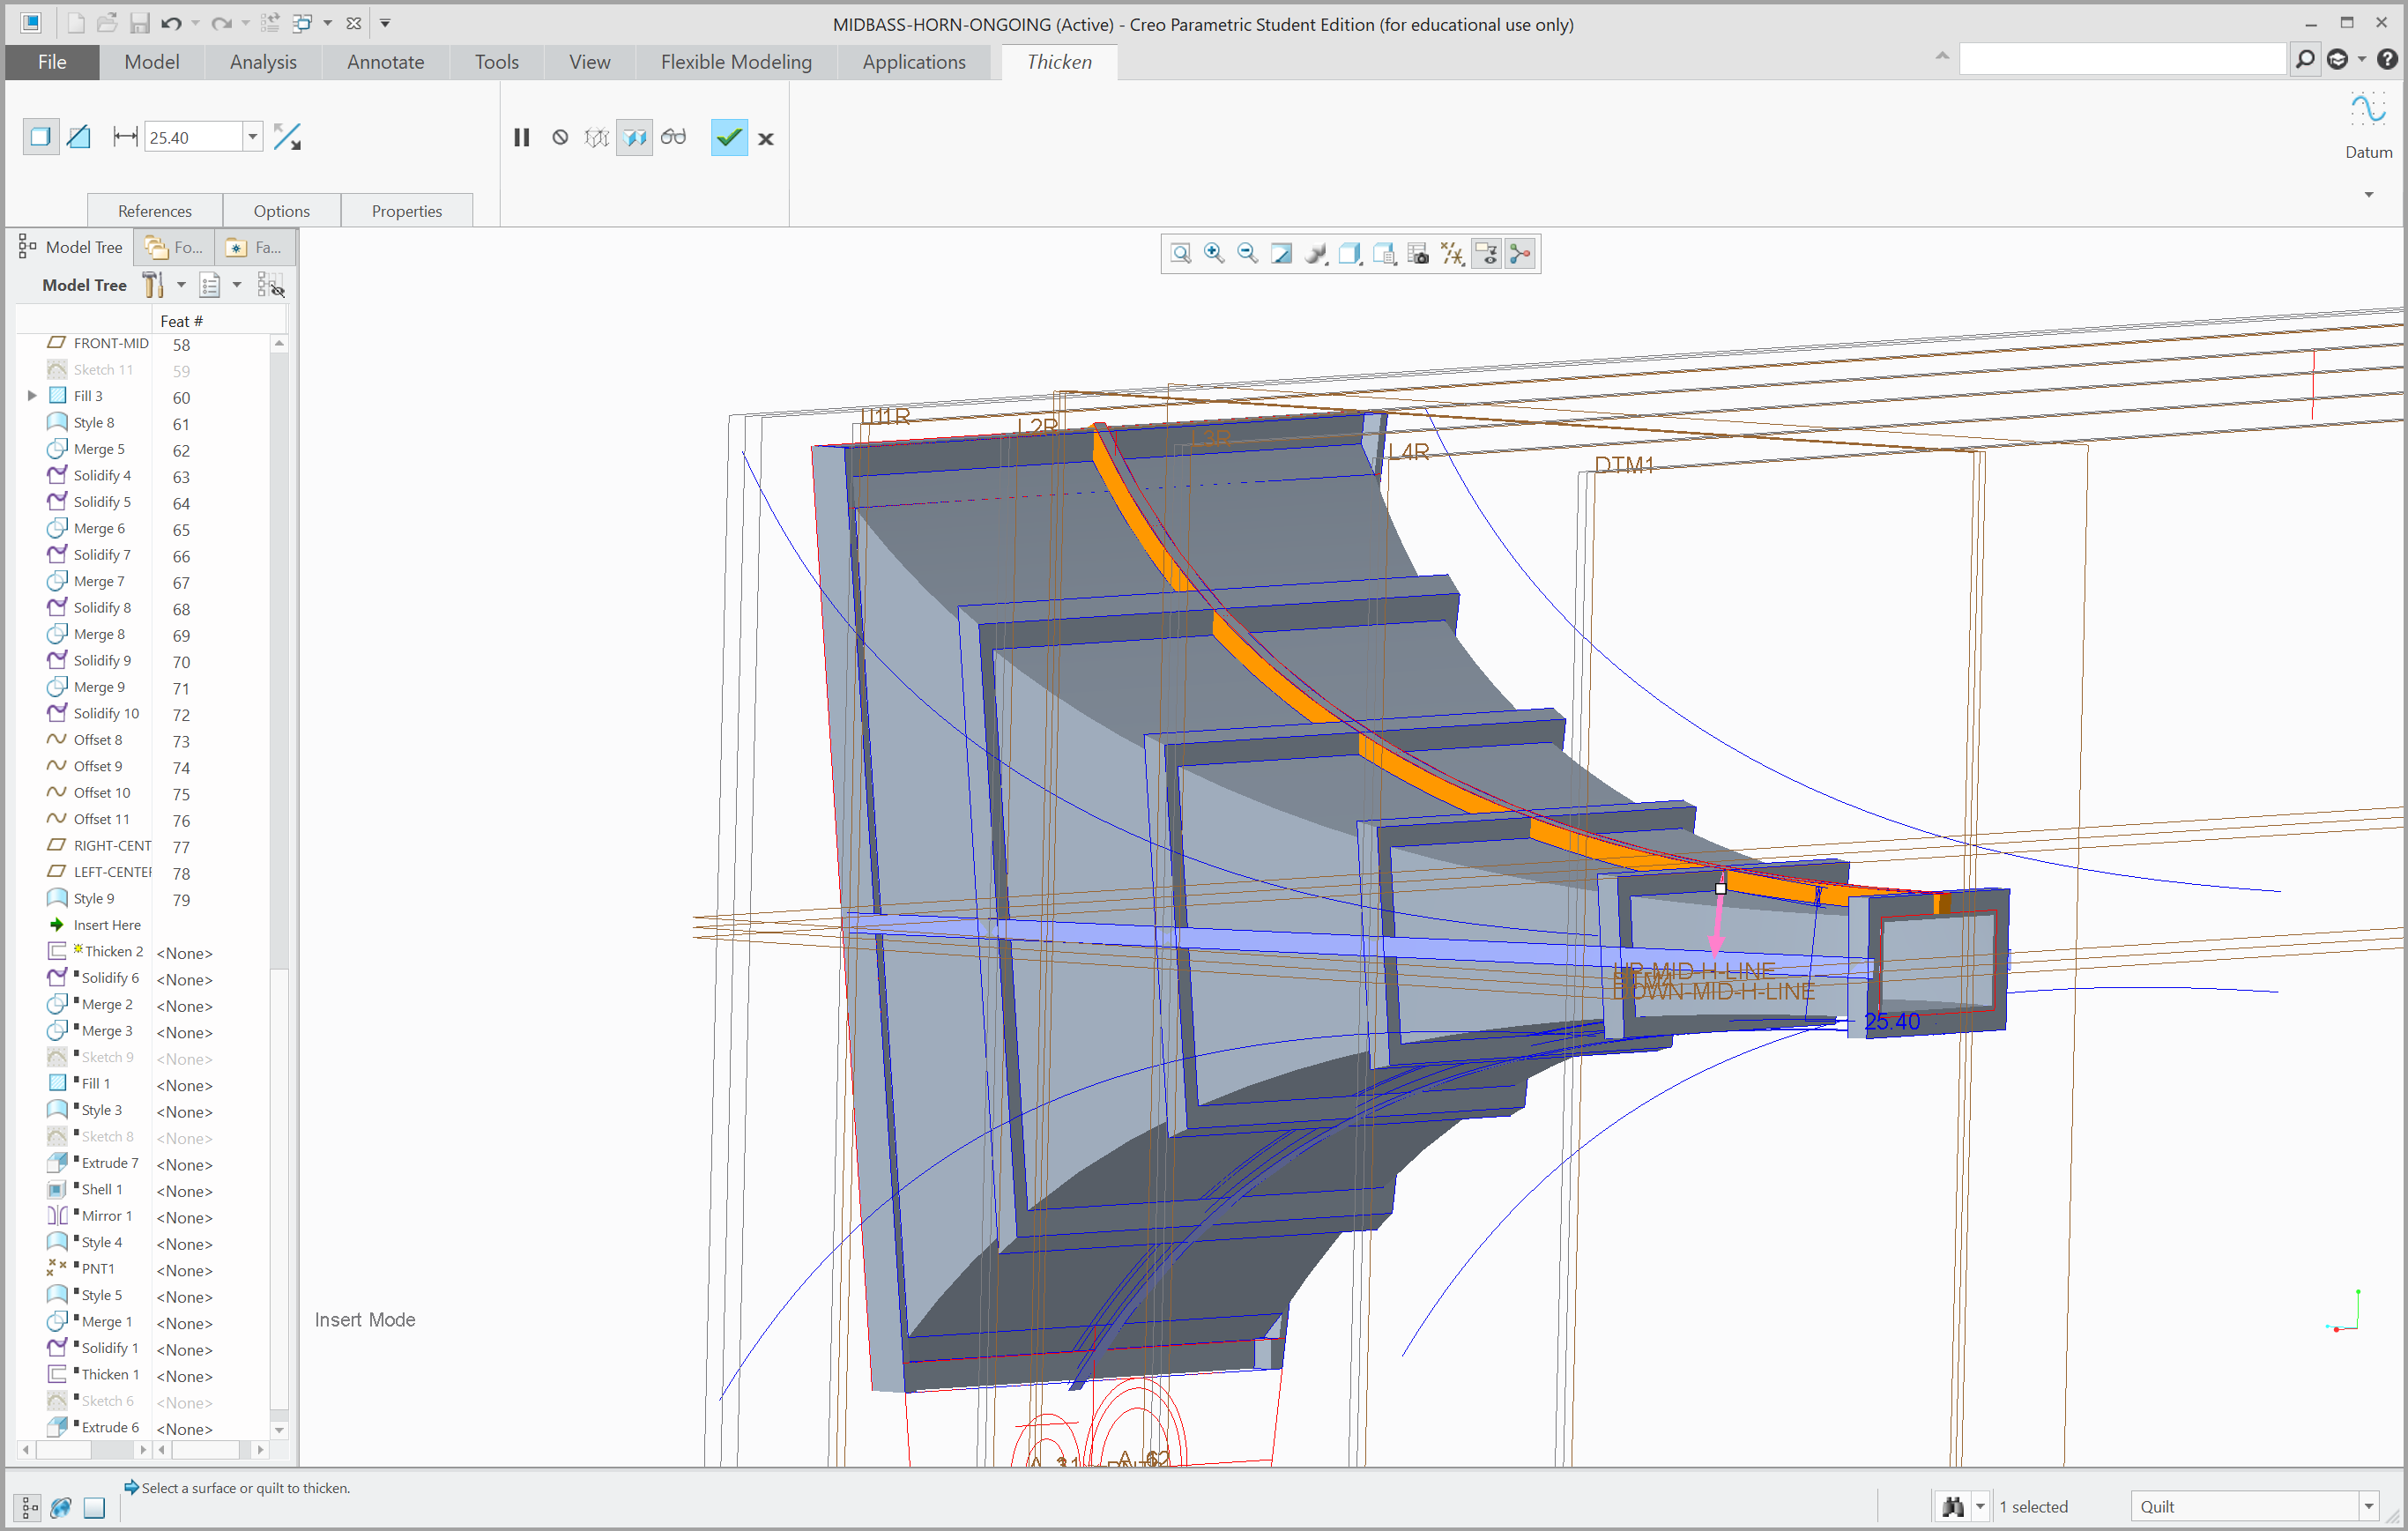
Modeling the large black horn structure presented several difficulties, since the front is shaped as a trapeze and the back as a rectangle combined with the curved top and bottom.
First, the overall shape was made using the blend, solidify with removal and shell functions in Creo. Then, the stabilizing structures were modeled by offsetting and joining surfaces, creating extra datum planes, projecting curves down to the inner shell and creating surfaces joining the structure.
Finally, internal surface elements were deleted, and the structure was solidified.
.03
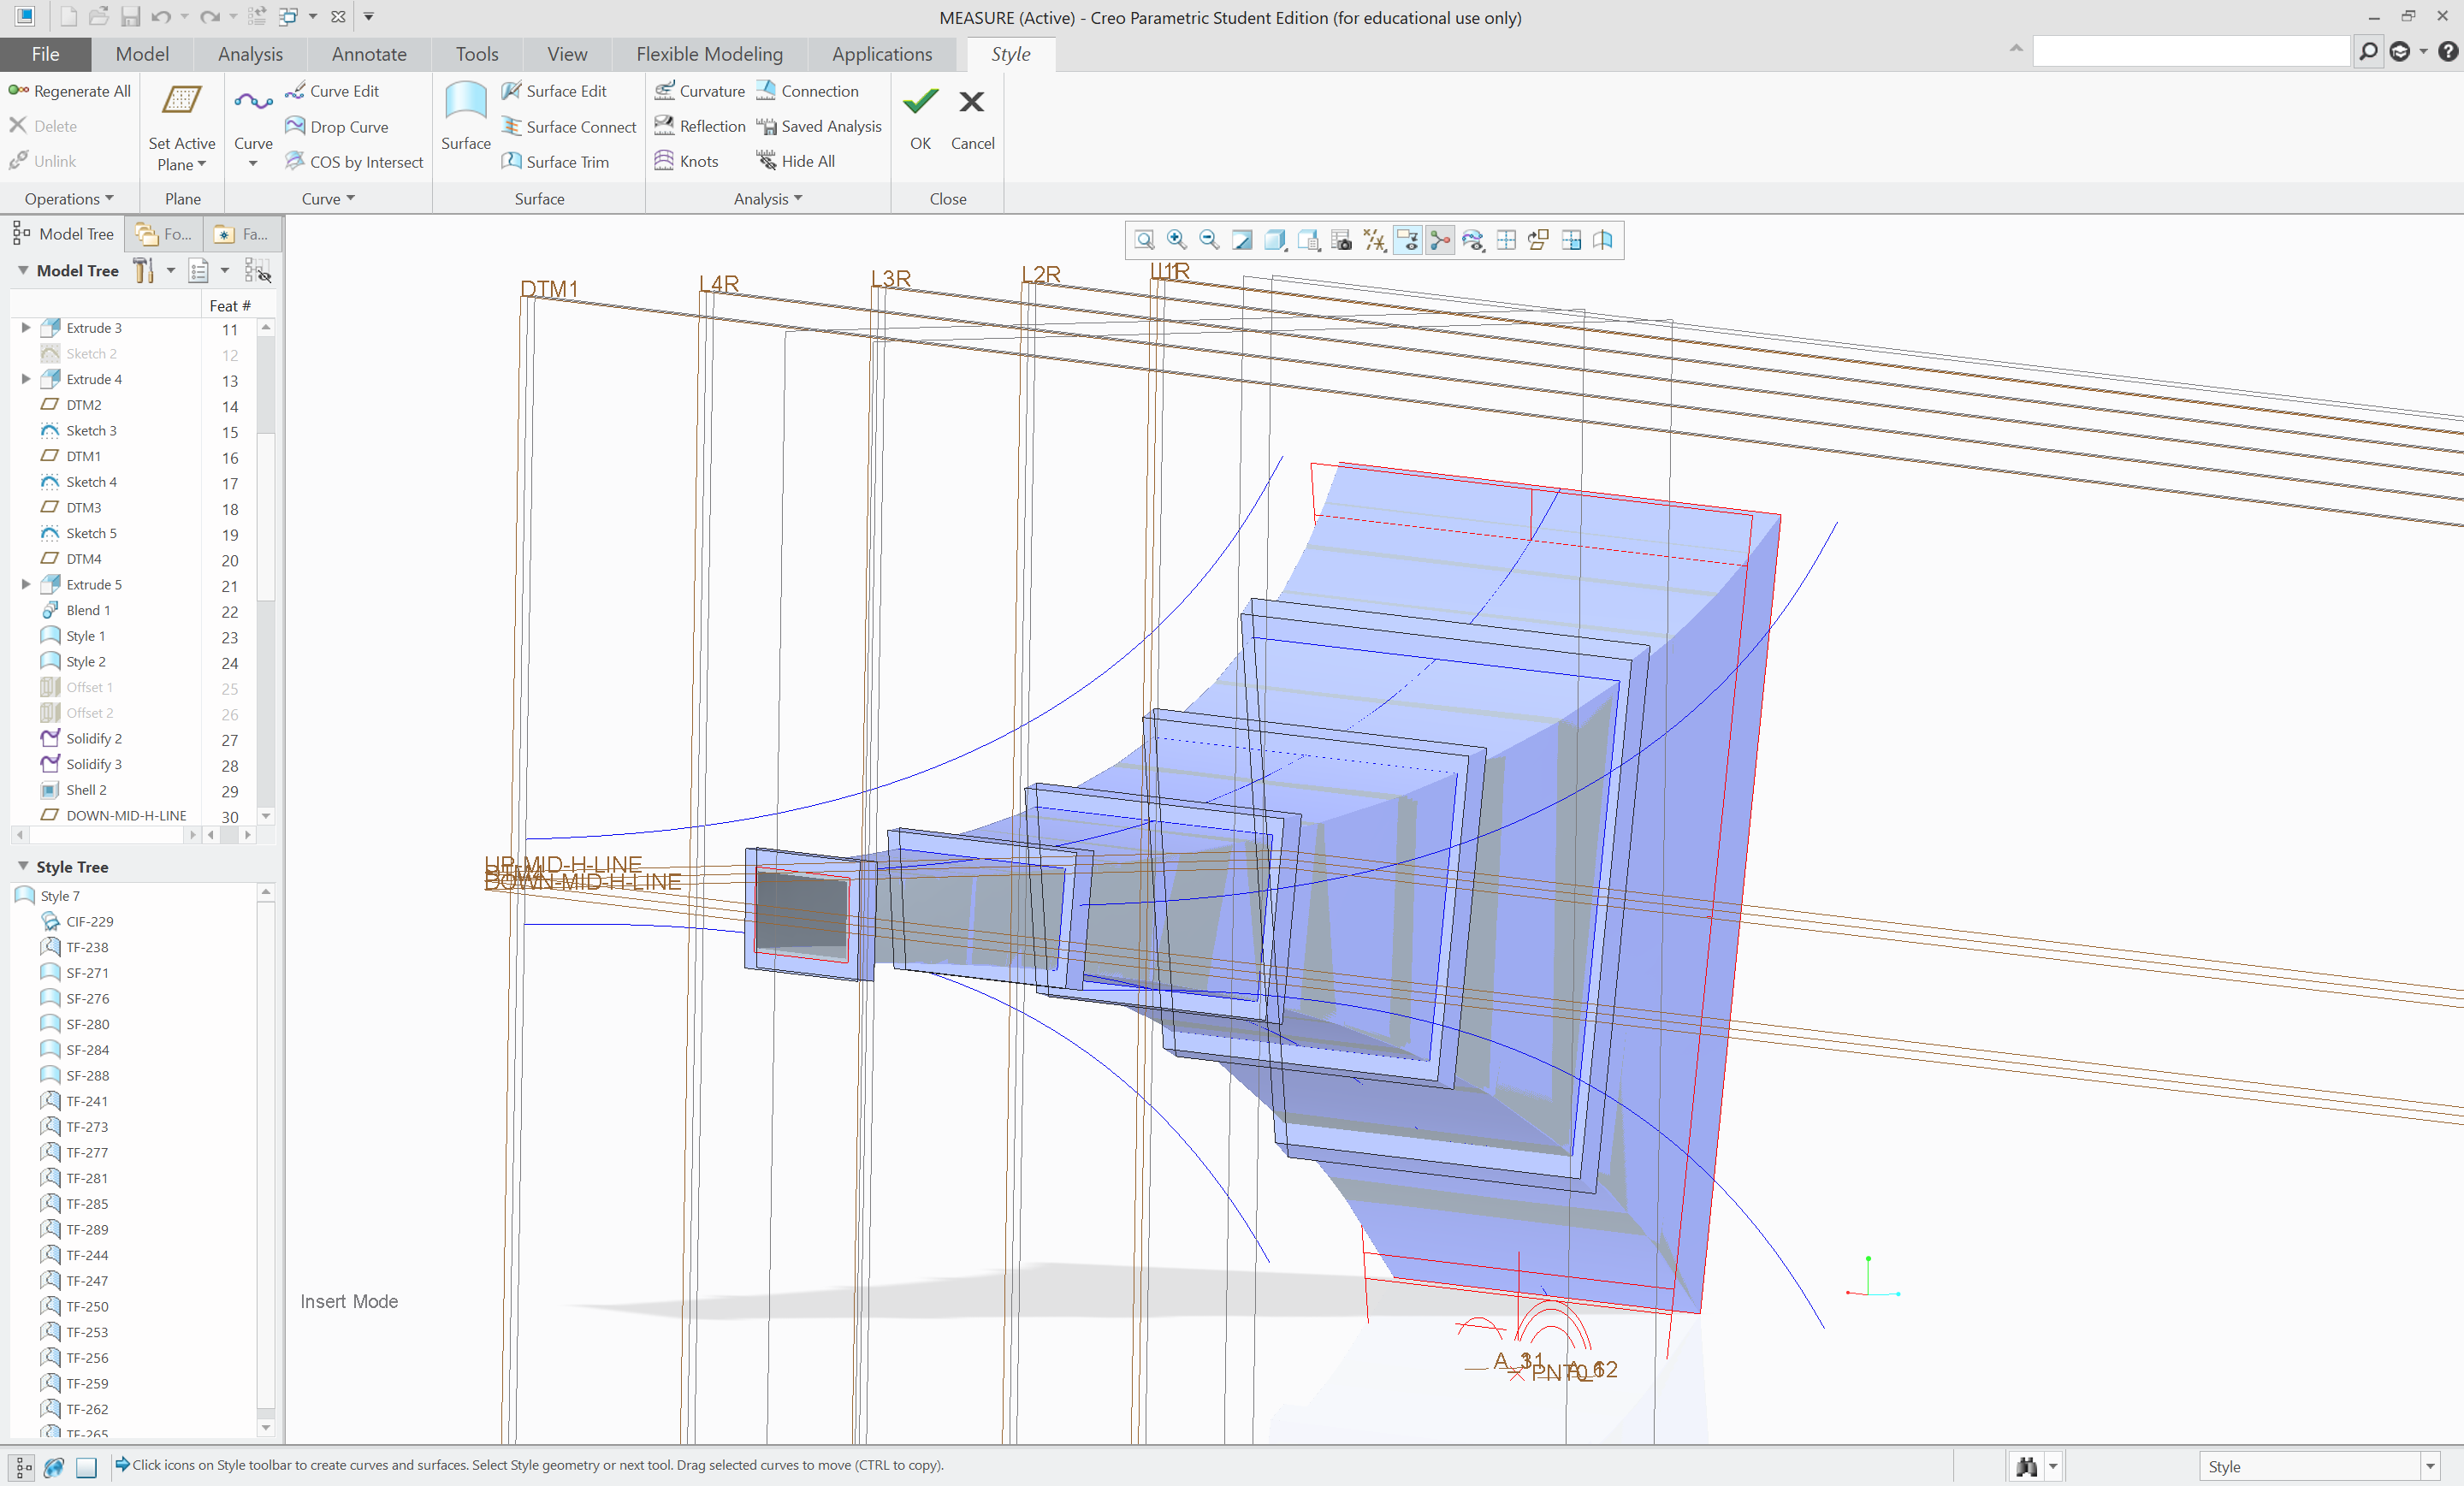
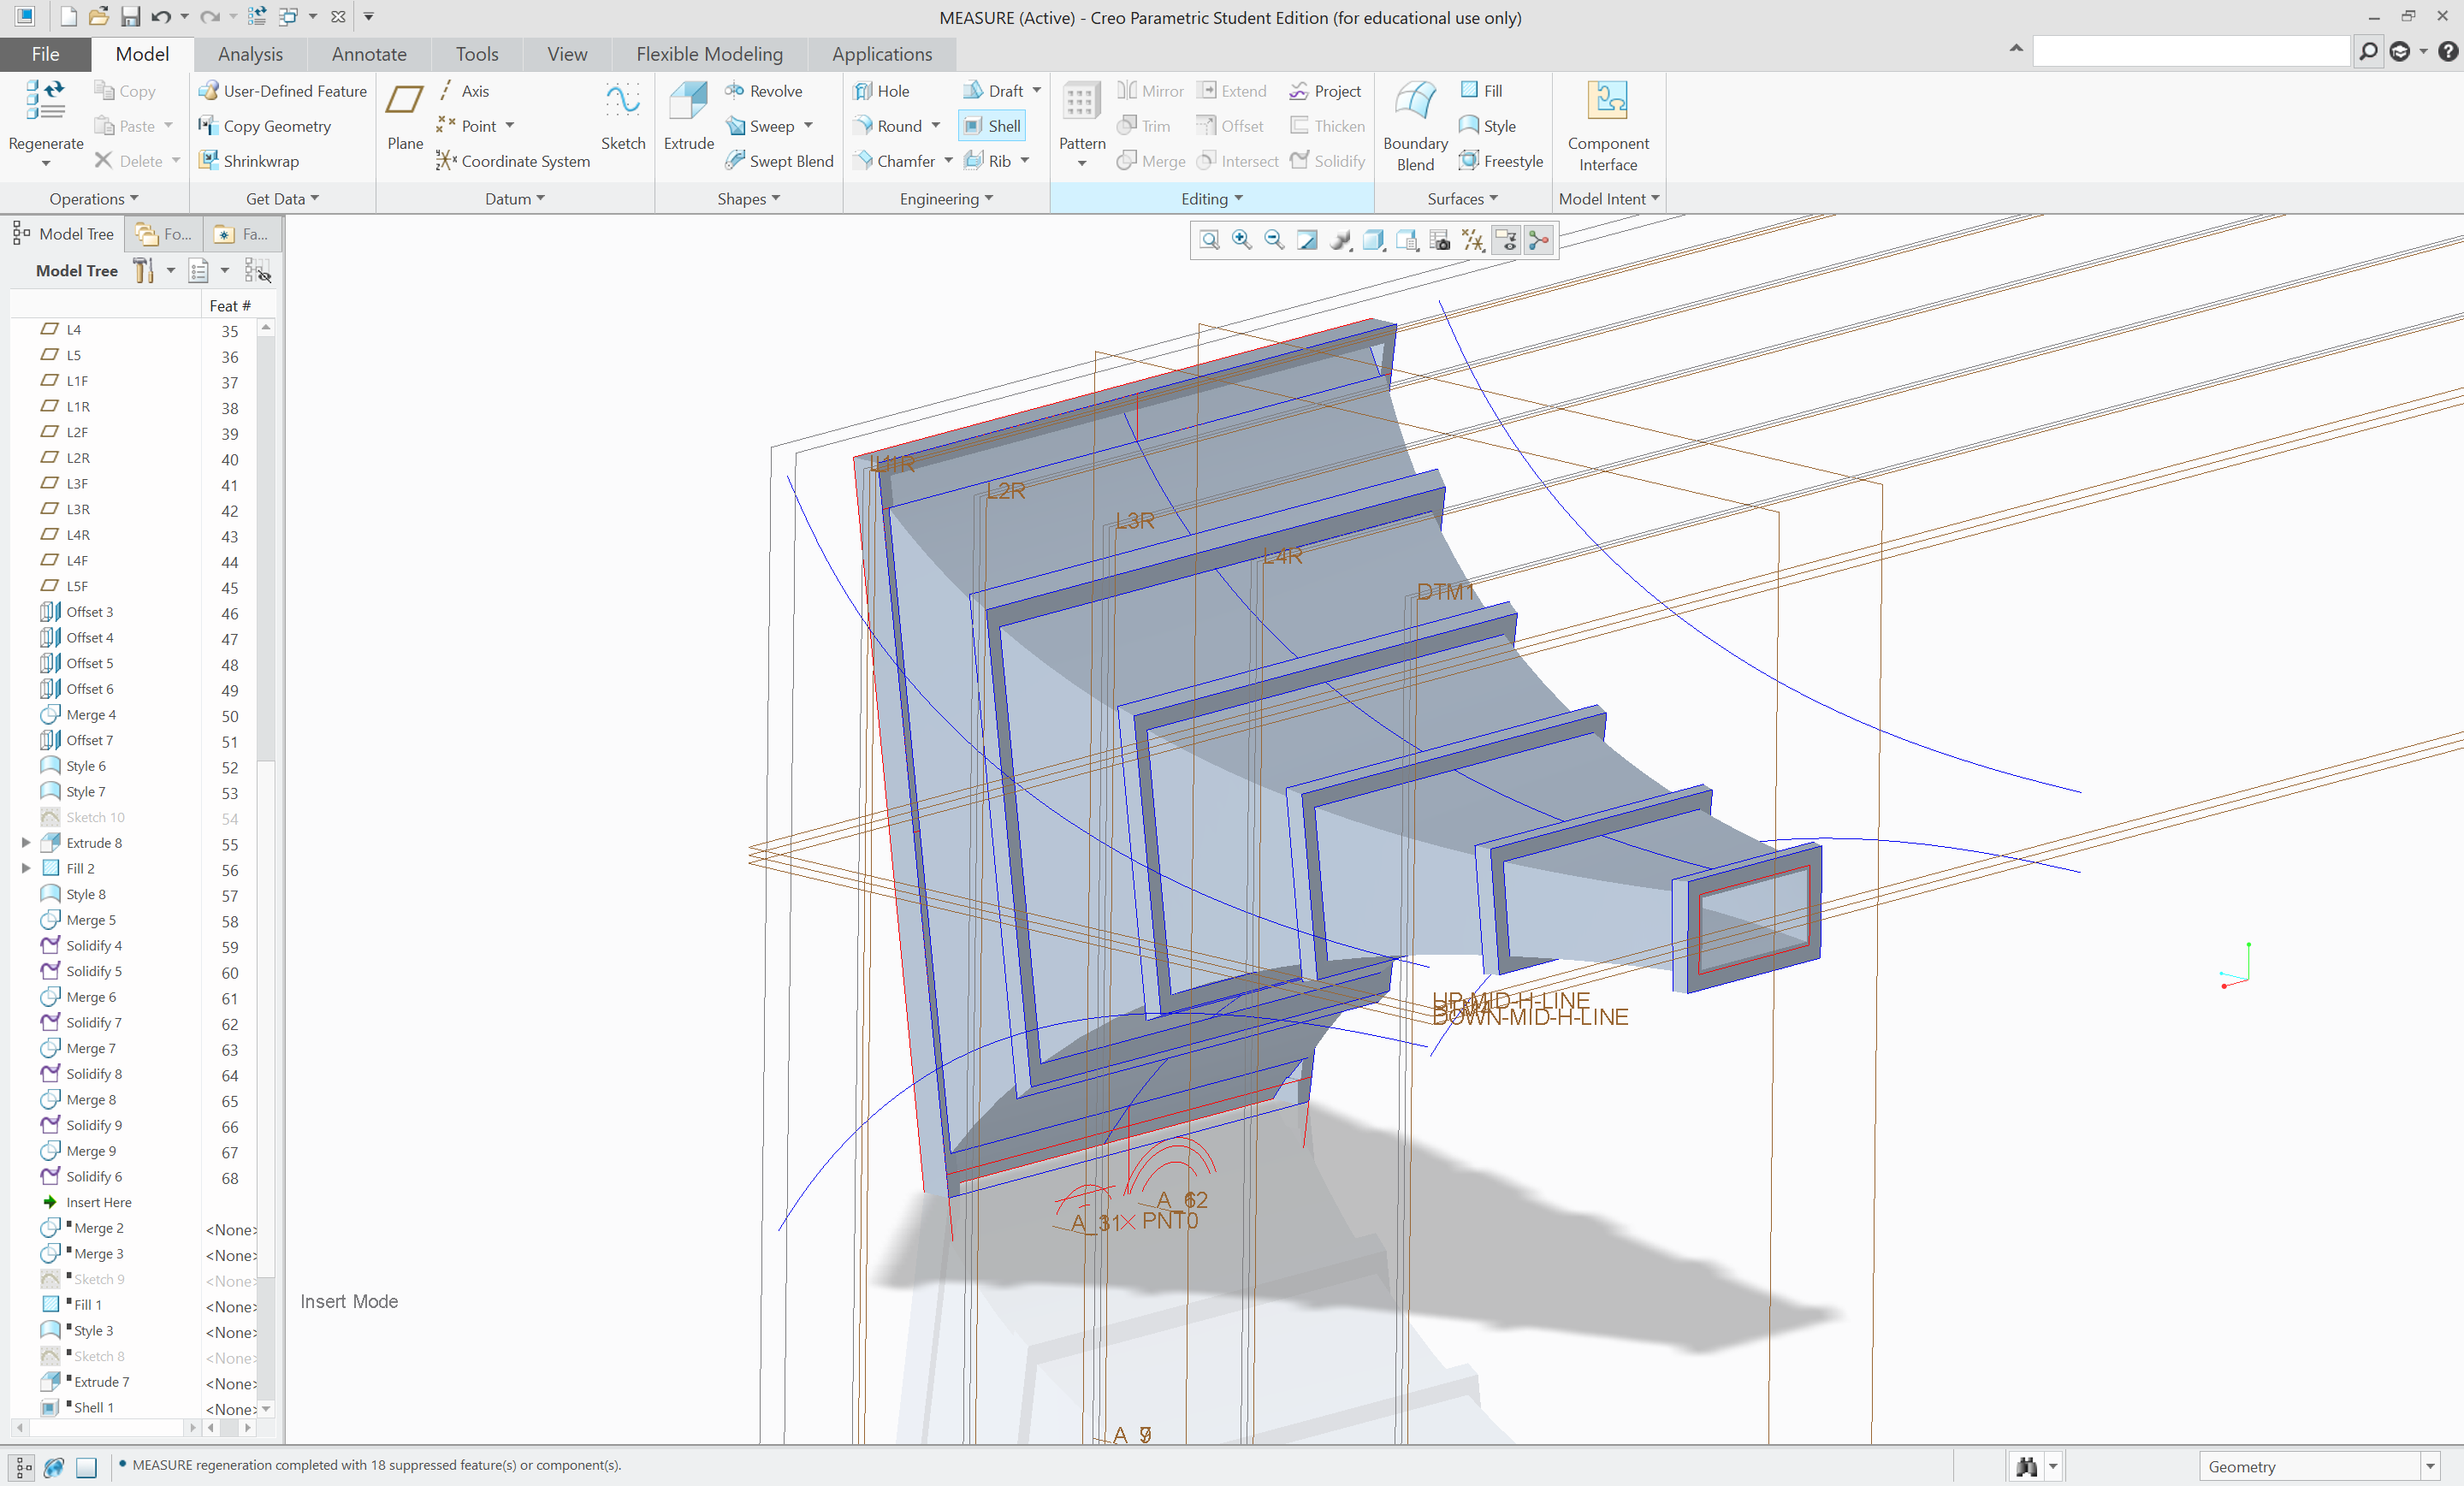
Modeling the support
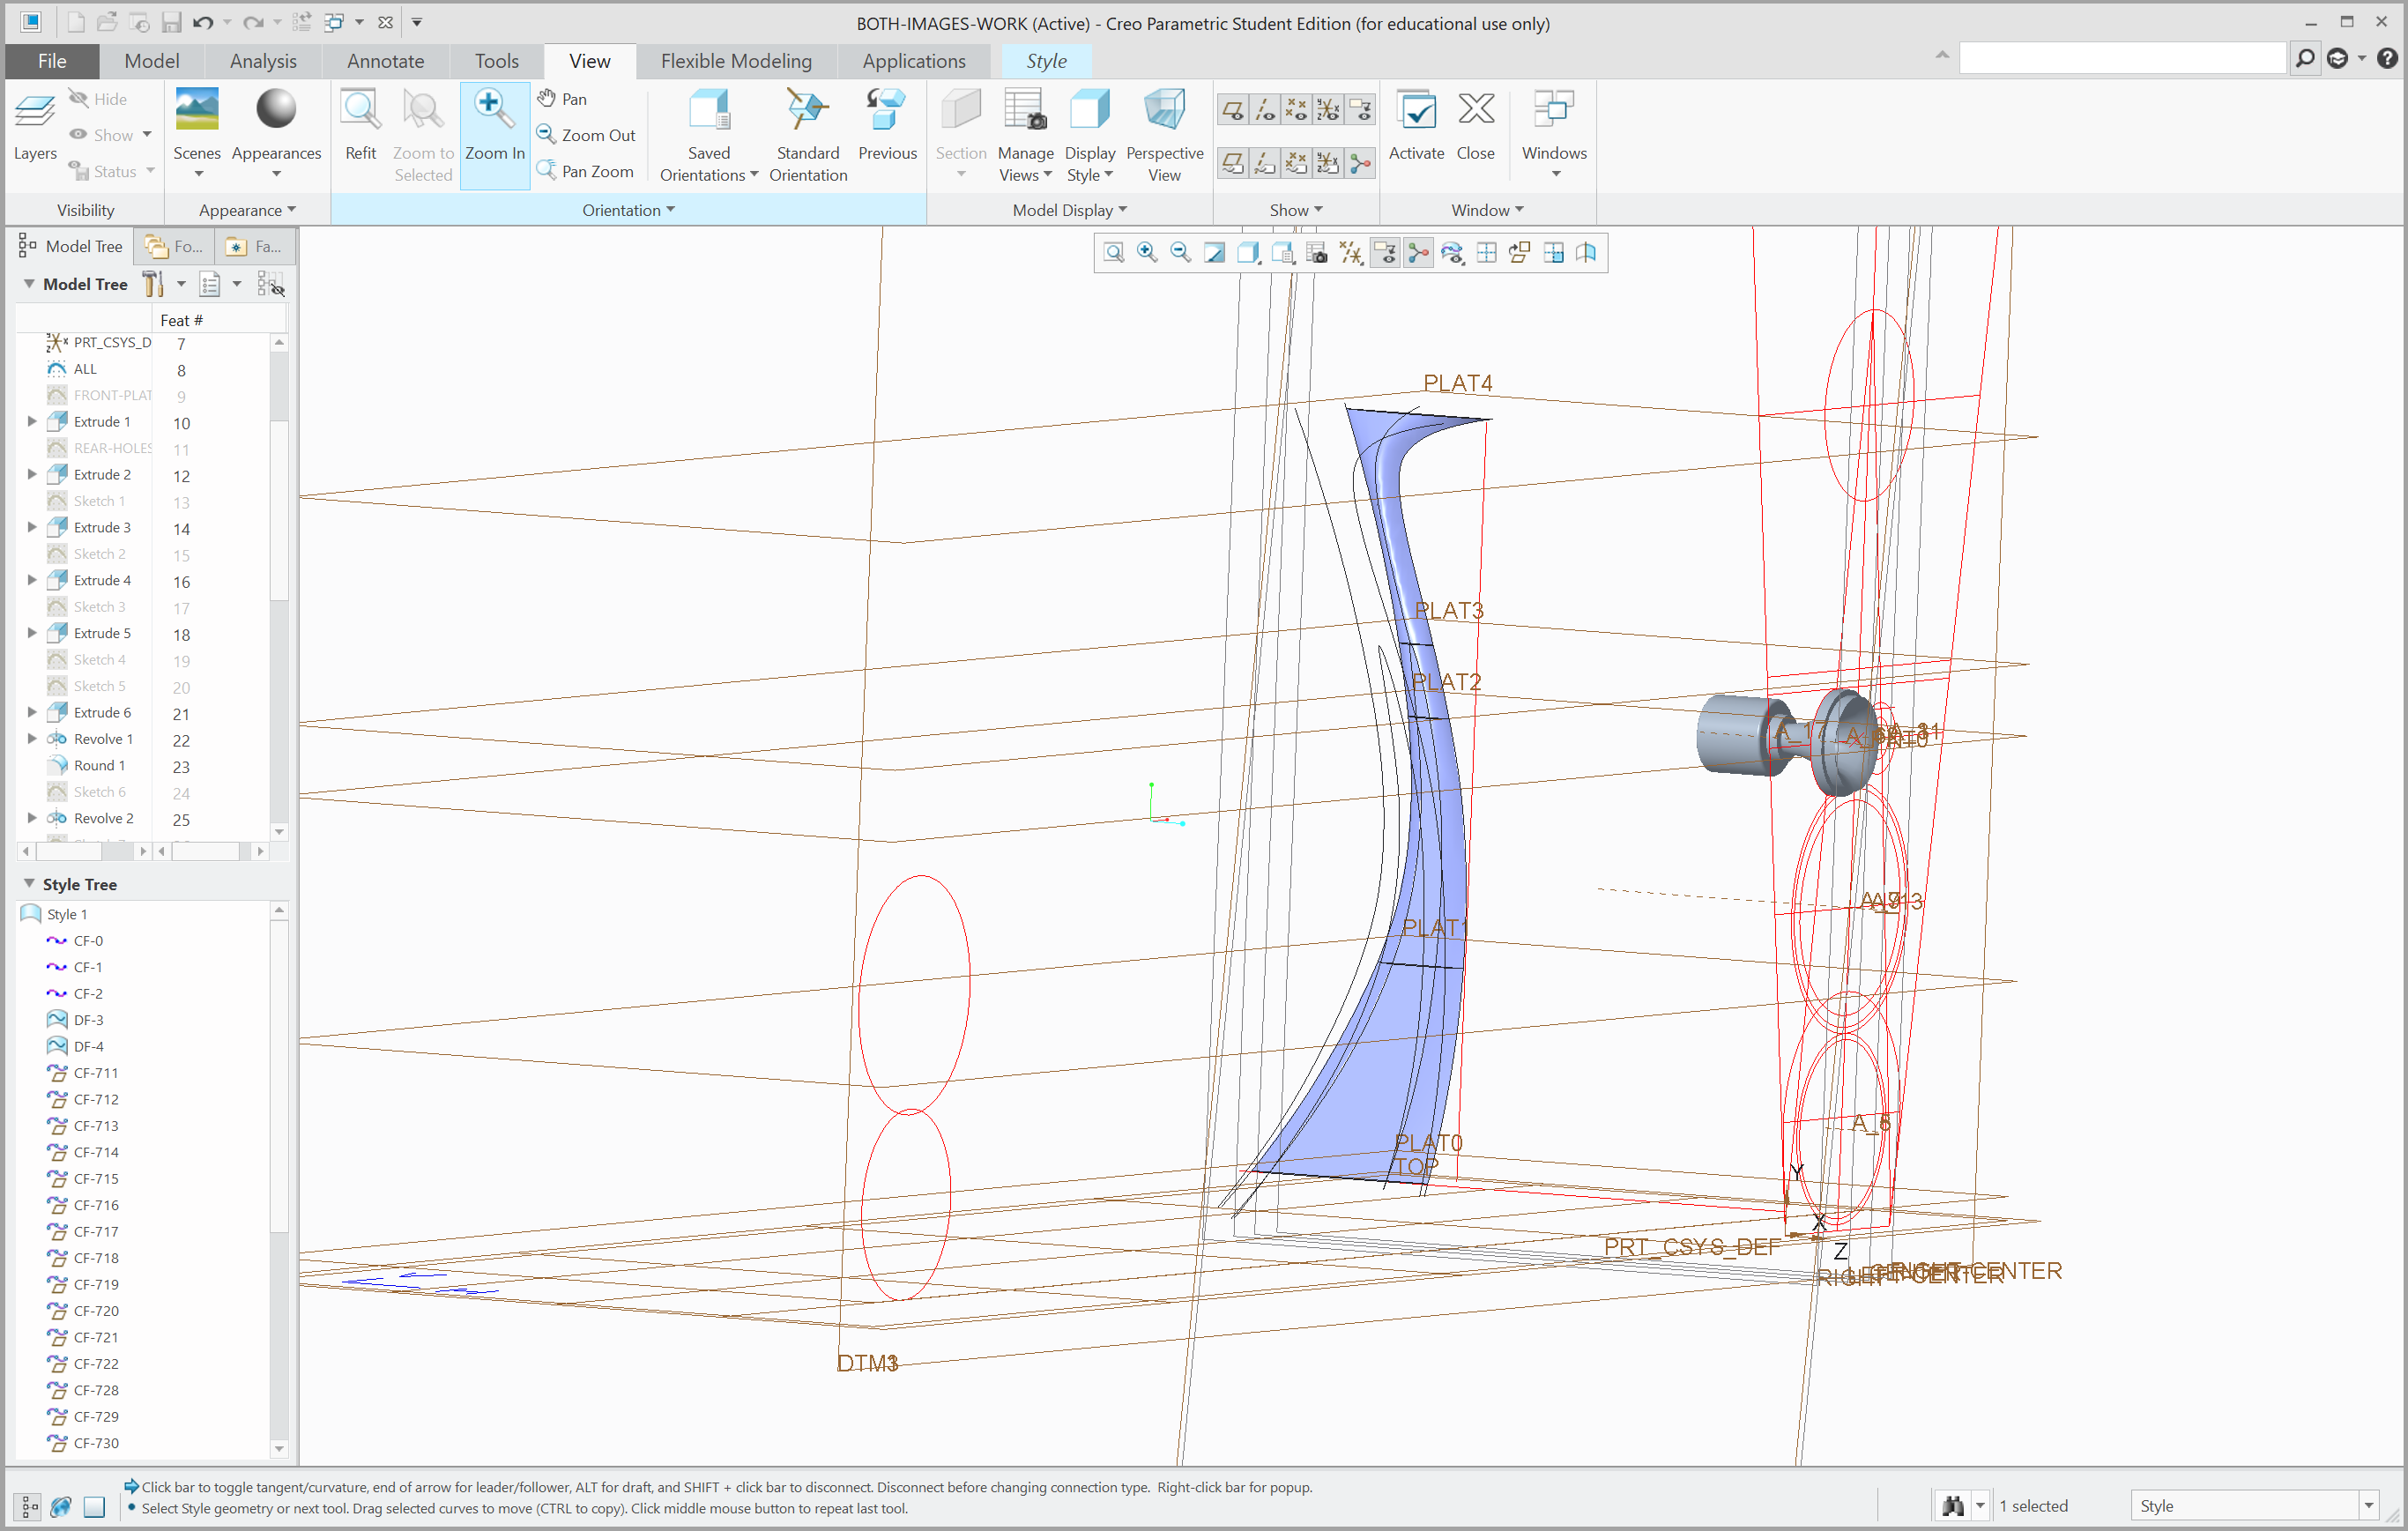
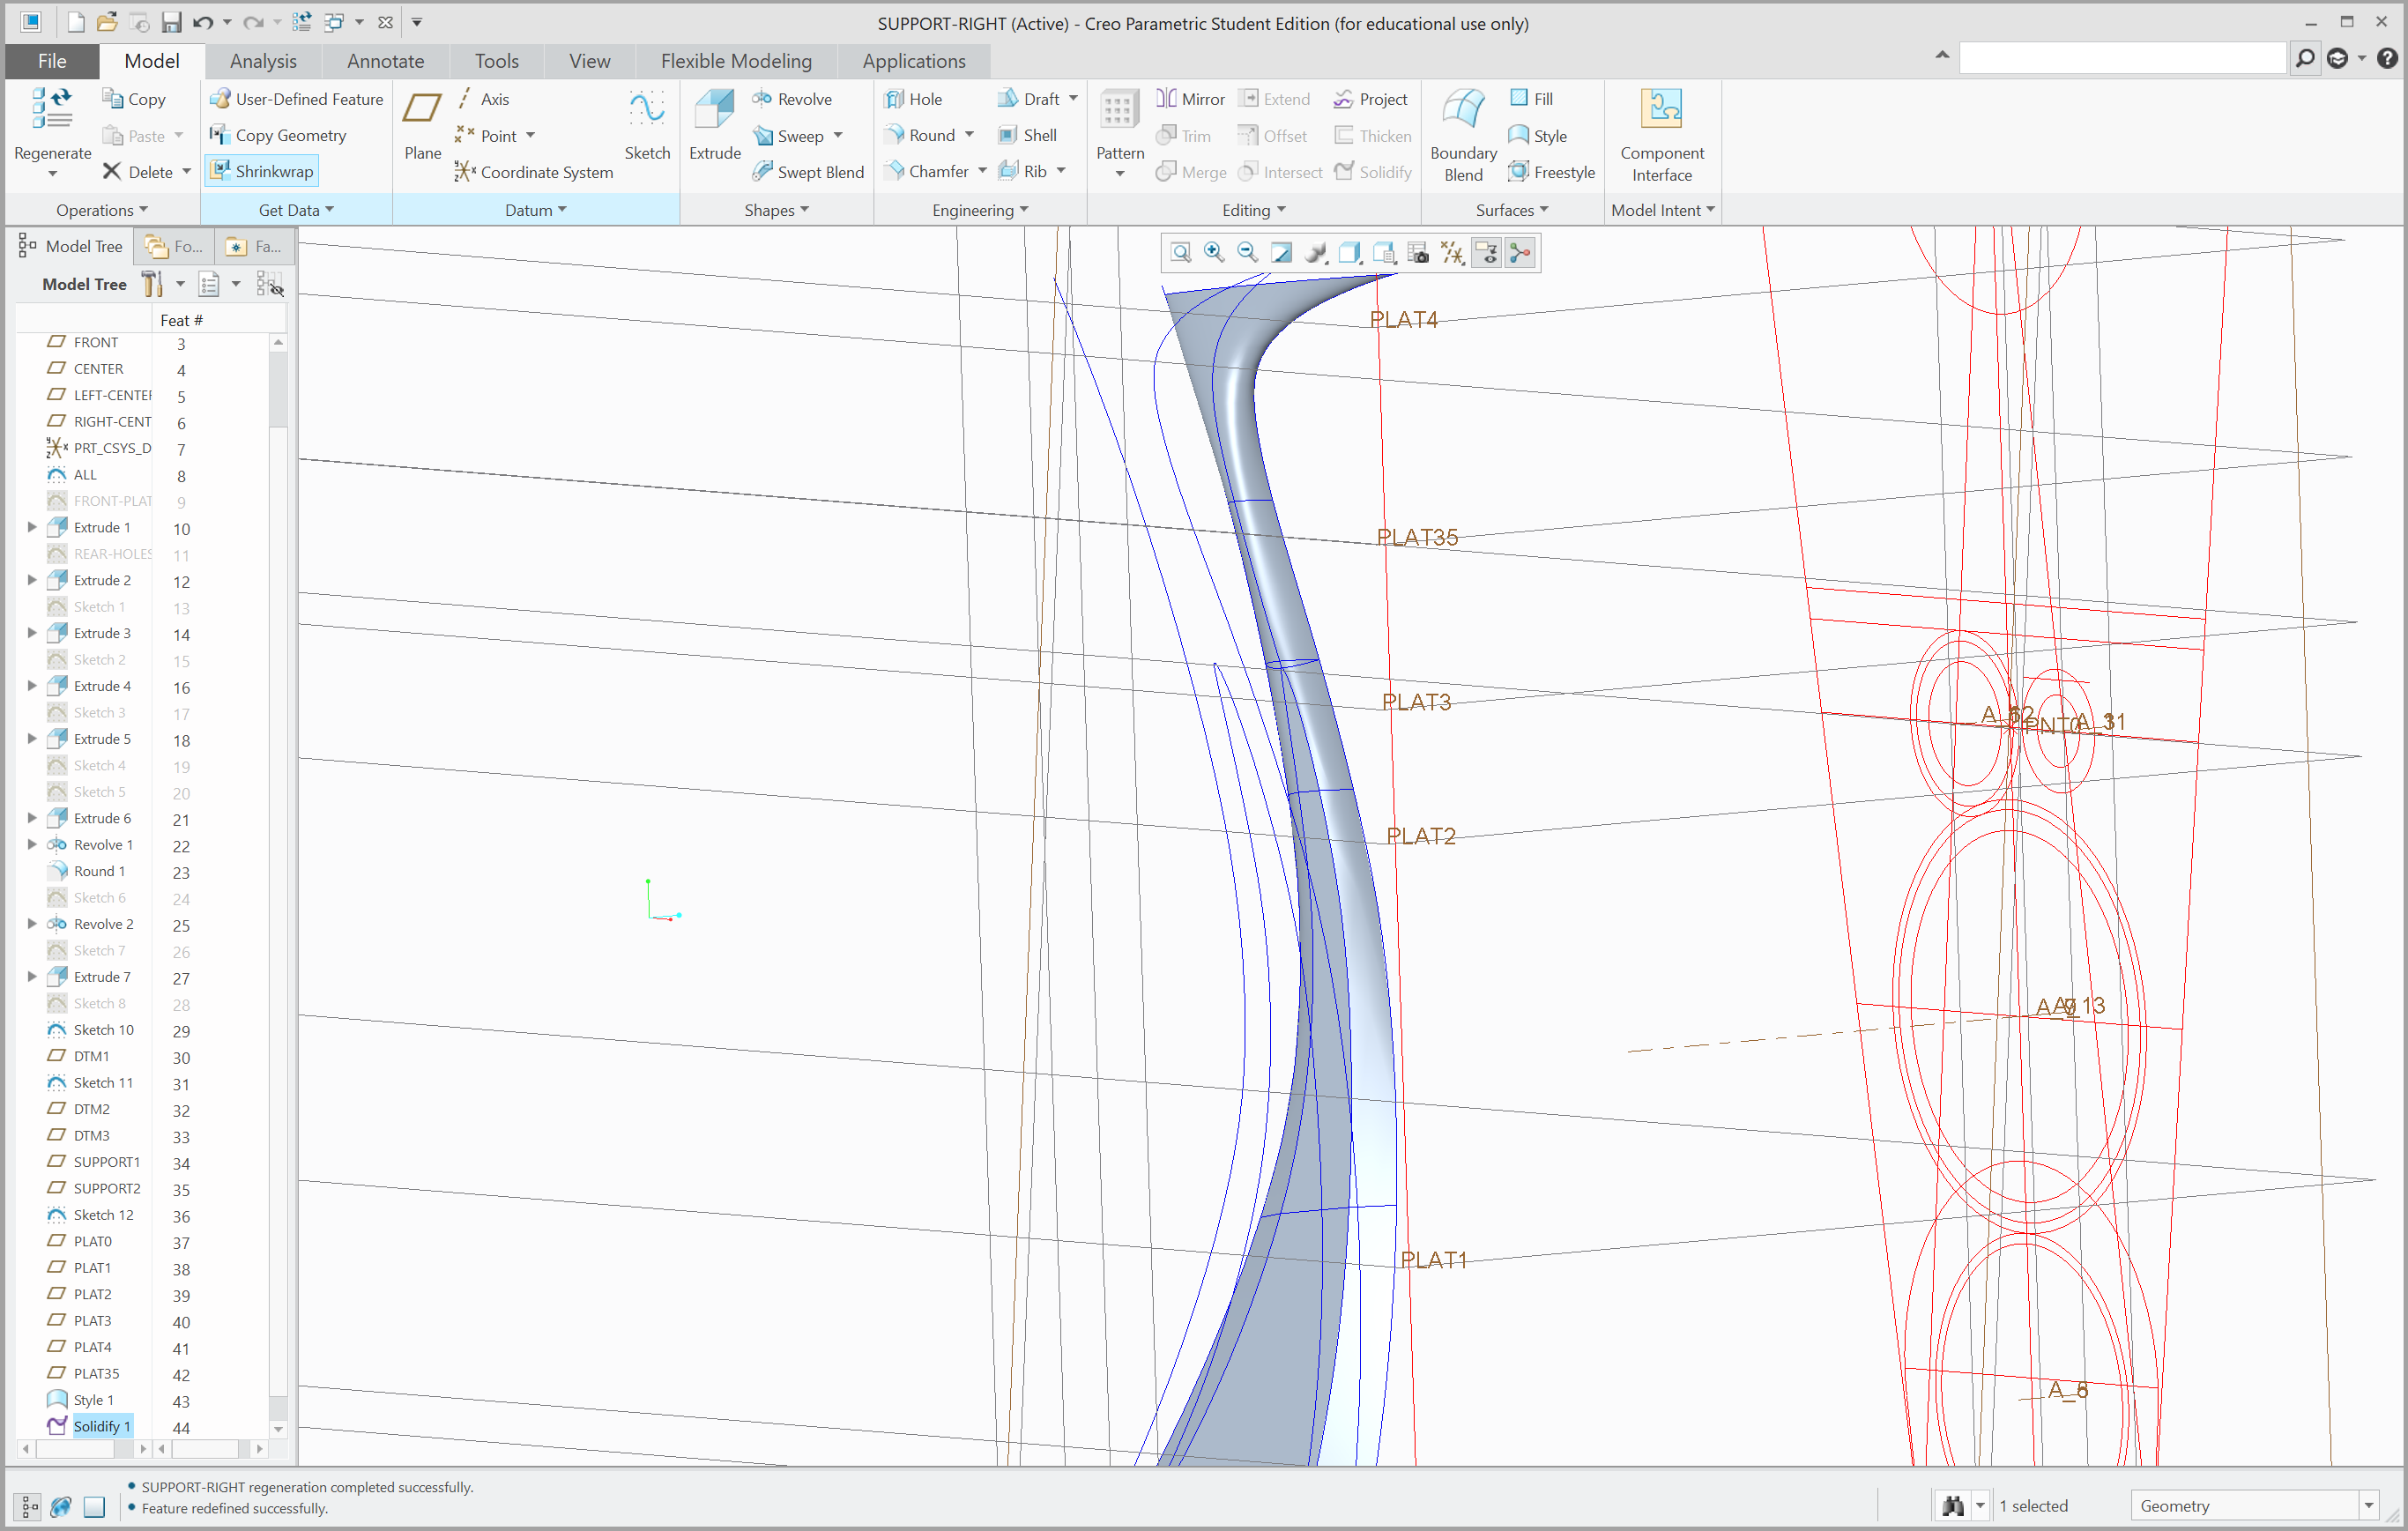
The sides of the supportive structure to the rear of the speakers are shaped more organically than other components, and are angled inwards toward the top.
Two datum planes following the innermost and outermost surfaces of the component were first created. Then, curves following the outline of the component was drawn on a vertical datum plane, seen from the side of the speaker. Following this, multiple horizontal datum planes were created at different heights, on which the outline of the component was drawn, seen from above.
Finally, surfaces were created between all the curves using surface connect. Additional horizontal planes were necessary for a satisfactory result.
04.
Rendering
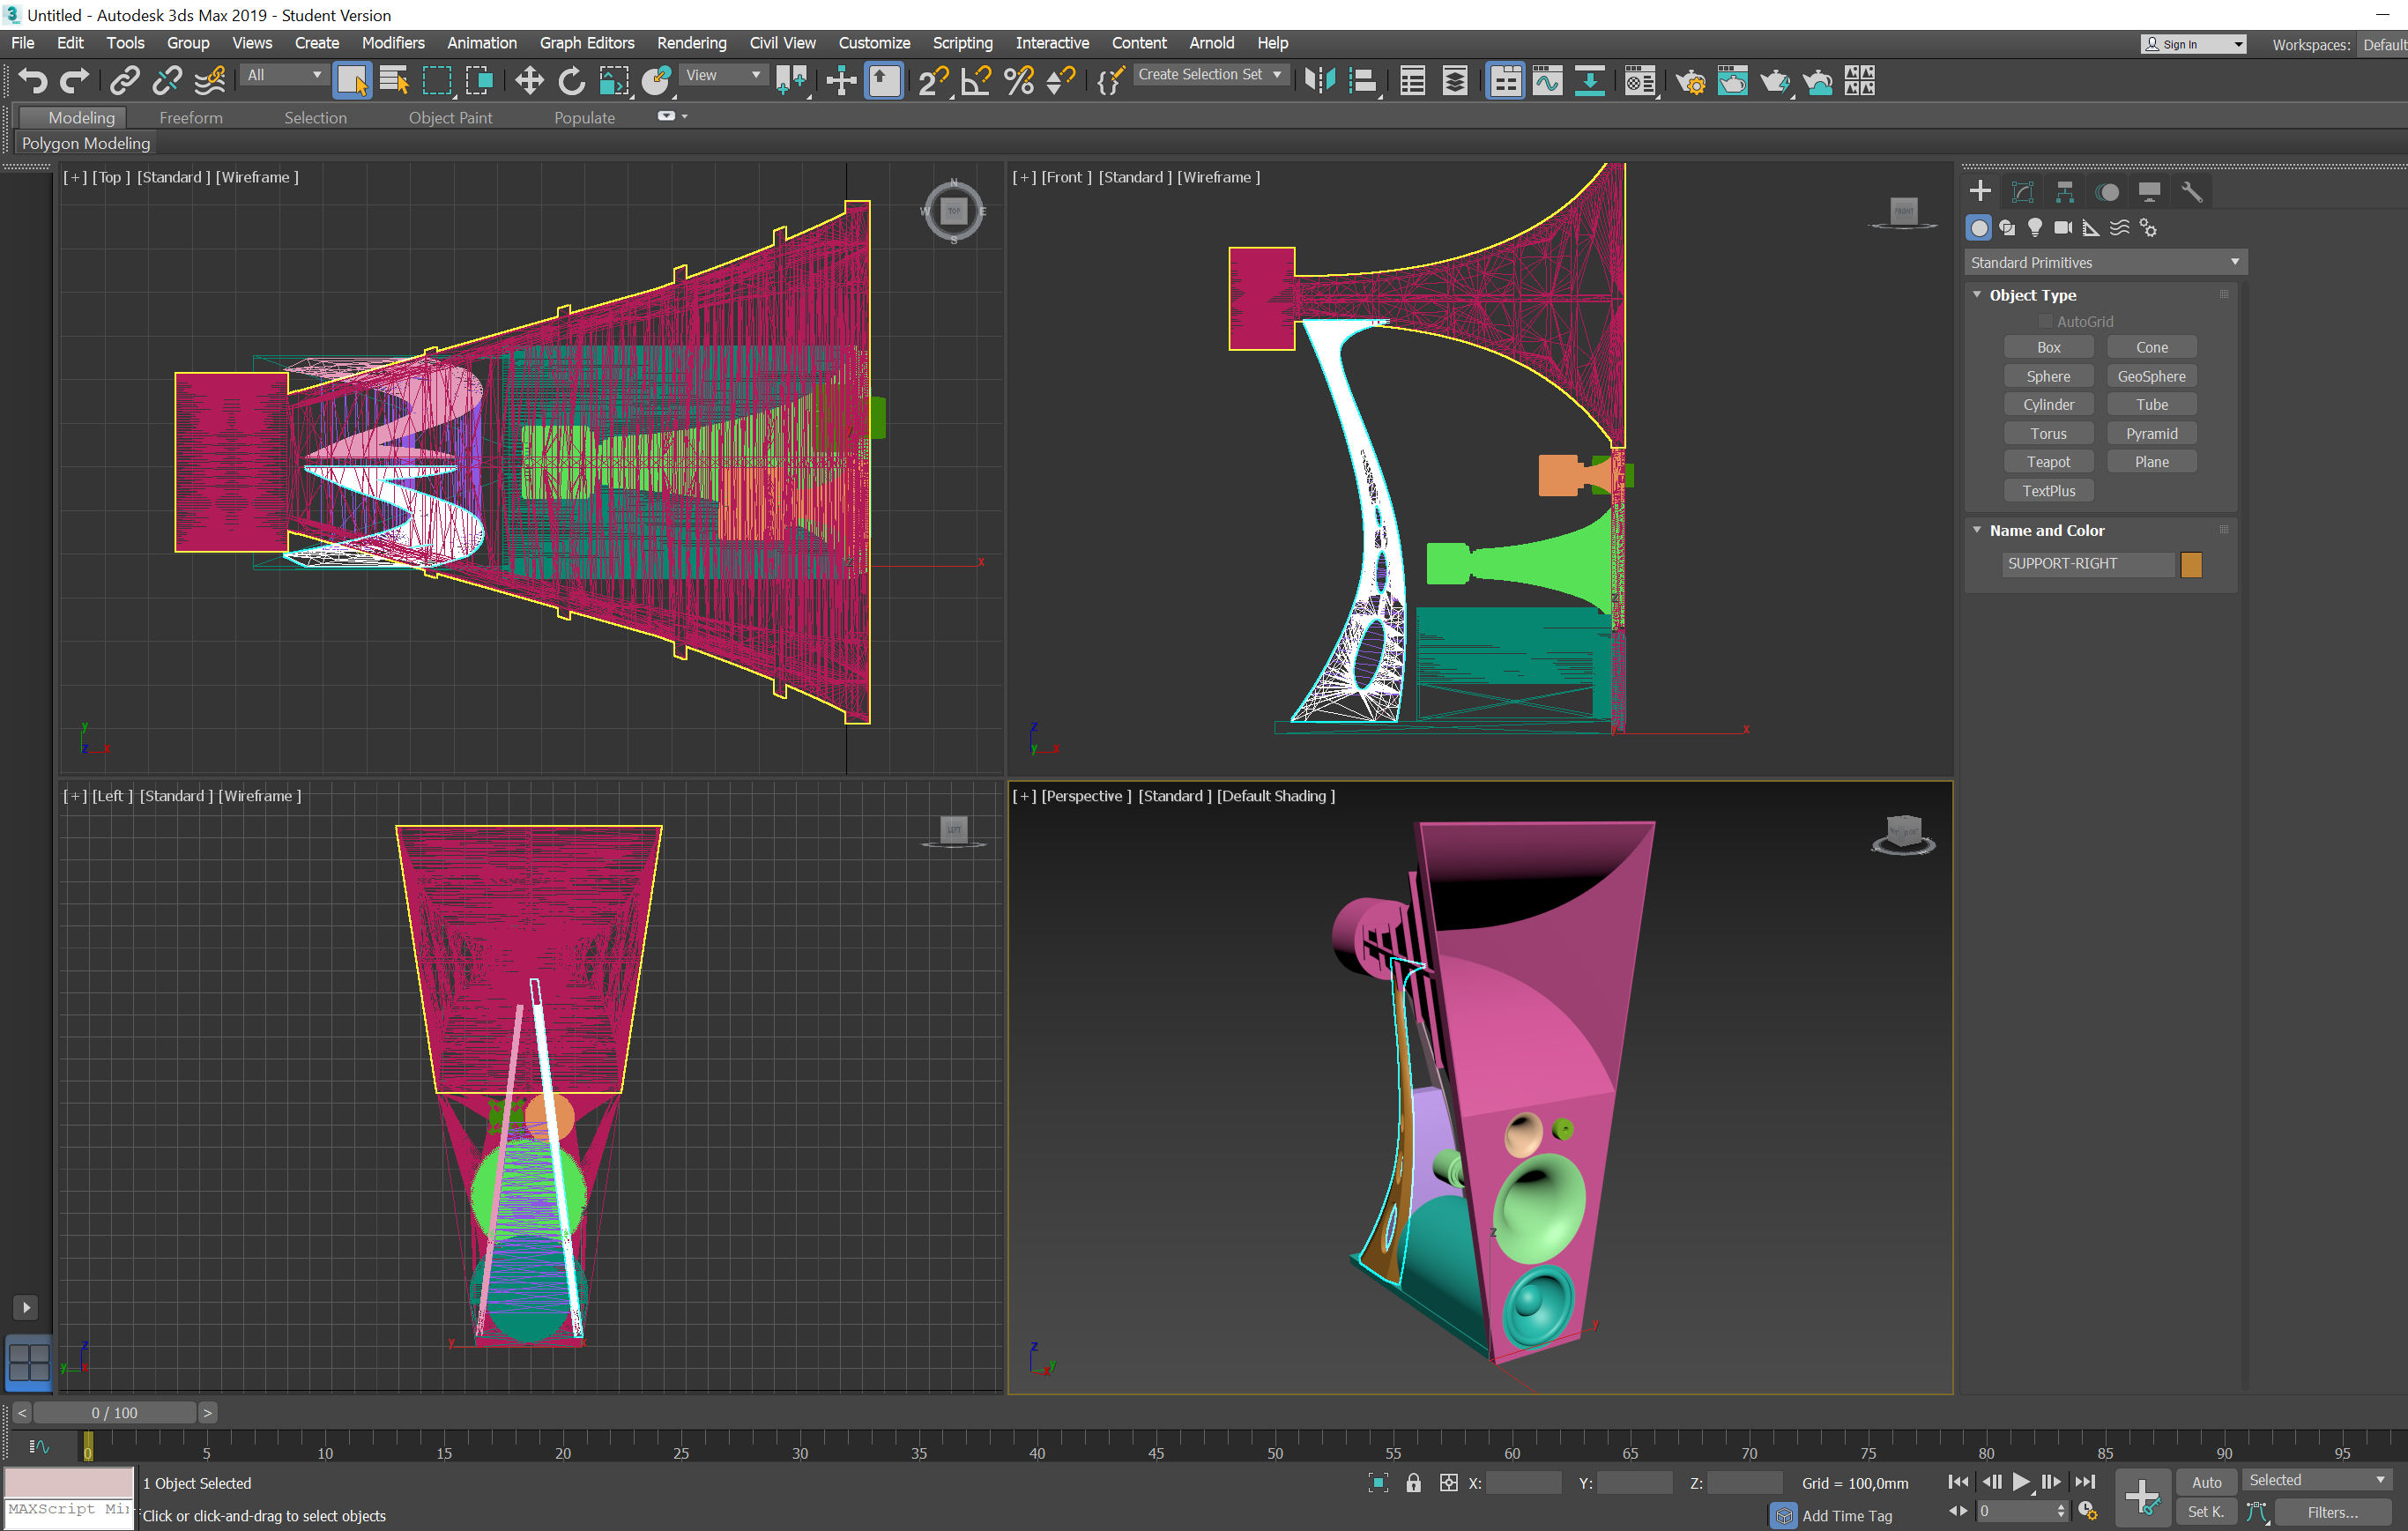
The model created in PTC Creo was exported and subsequently imported to Autodesk 3DS Max. Here, a material surface package was used to replicate the look of the materials used in the speaker construction. The look of materials was matched with both product renders from Magico and real-life photos of the speakers.
A large room was modeled and styled using a bump map of a wooden floor, a white wall paint color and skirting boards. Several point lights with a variety of settings were then set up, and camera positions locked in. Renders were performed using the Arnold rendering engine.
The goal was to create the feeling of a large well-lit room with multiple sources of light and natural shadows.